Photo galleries
Key points on this page:
How to
Create a photo gallery
Part 1: Create a photo gallery index block
- Upload your images to the Shared Assets website in the CMS. Each gallery must have its own folder.
- Re-order images manually if needed—they will appear in the gallery in the same order as in the folder.
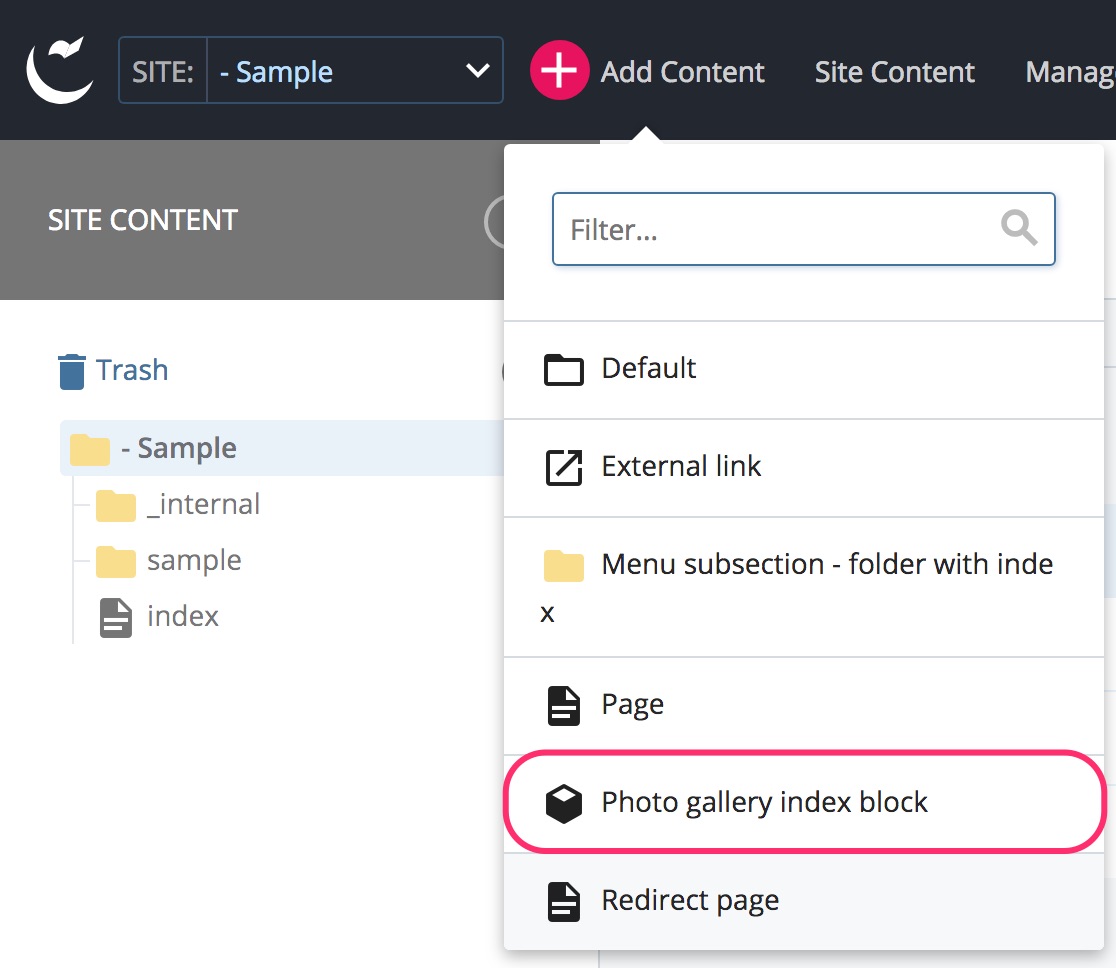
- On your site, create a Photo gallery index block . By default, this asset will be created in the _internal/blocks/index/photoGalleries folder.
Select Add Content then Photo gallery index block from the main toolbar. (If you don't see this option, contact us .)
- Fill in the Display Name and Title fields (use the event name and year for clarity).
- In the Index folder field, select the folder where you uploaded your images.
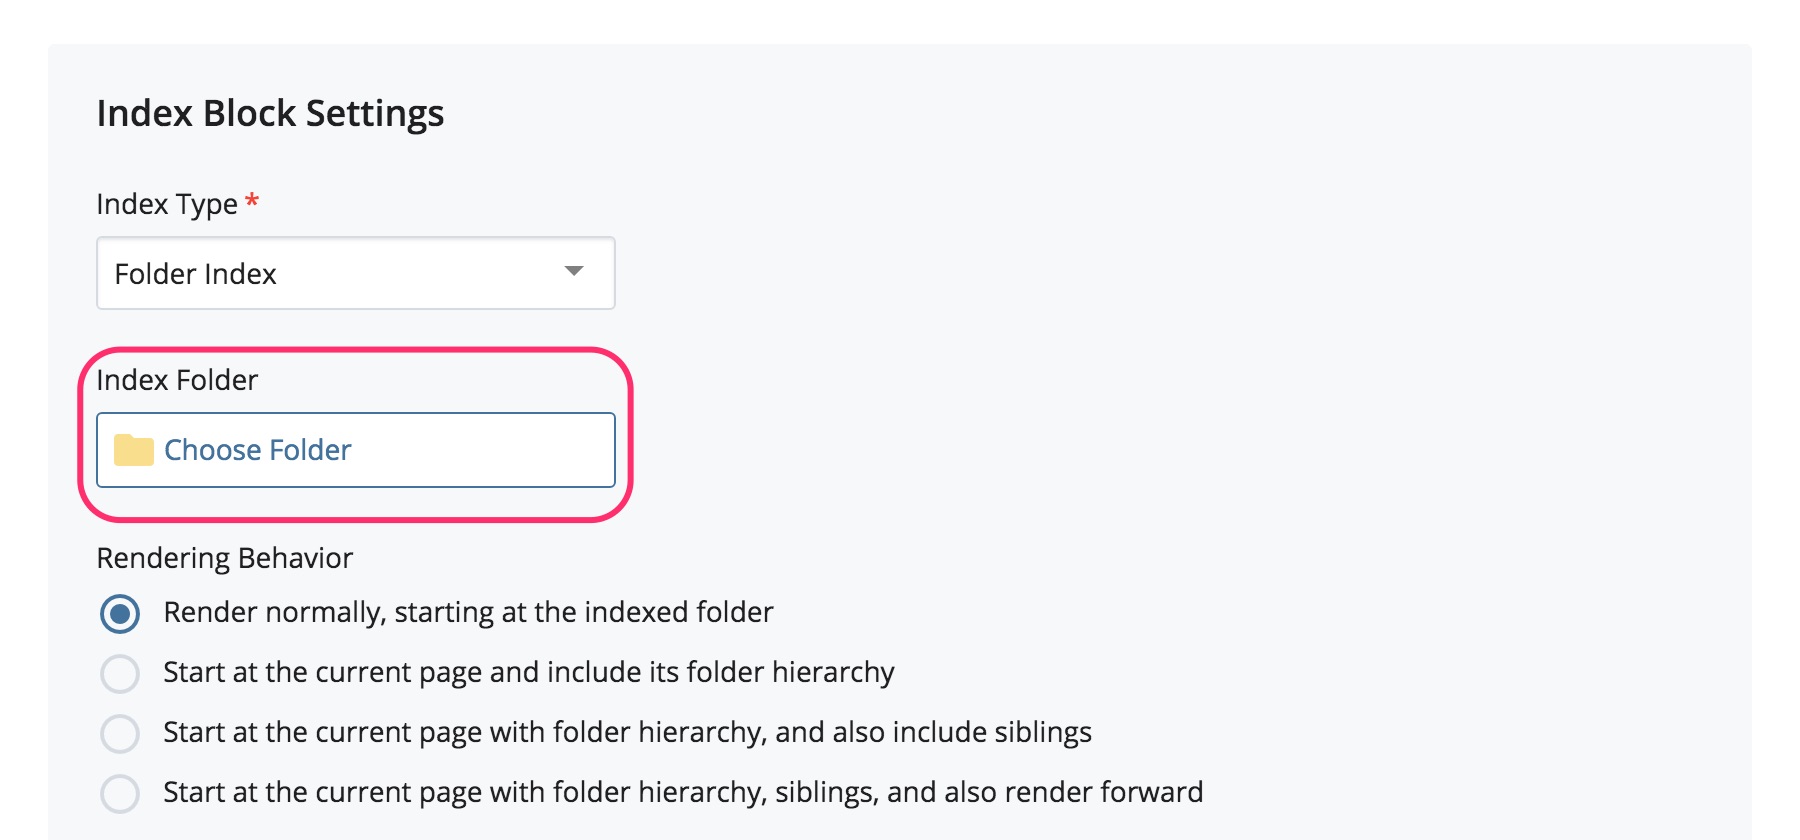
- Leave all other setting unchanged.
Part 2: Add the photo gallery index block to the page
- On your site, create a new page or edit an existing page.
- Create a new Section and select Photo gallery as the Component type.
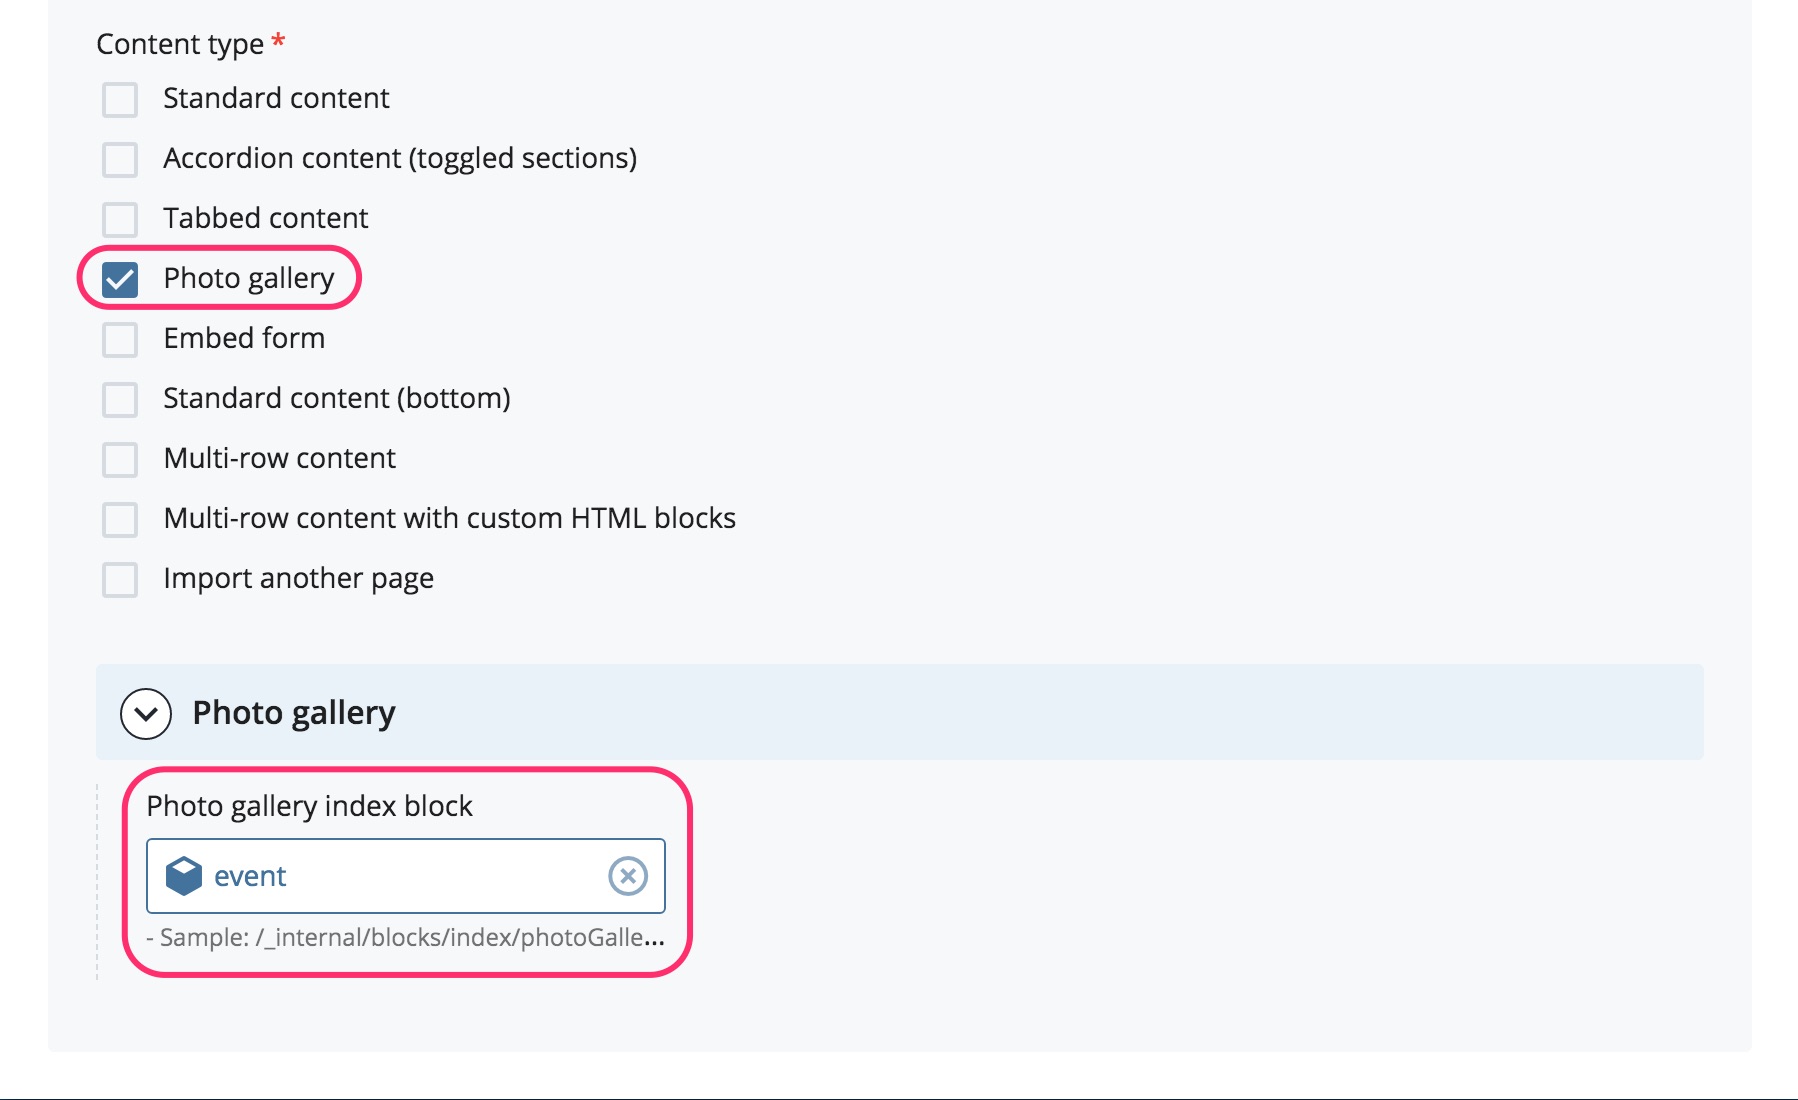
- In the Photo gallery index block field, select the photo gallery index block you created in Part 1.
How to
Batch/bulk upload several images
If you have several images you want to upload, you can batch or bulk upload them all at once.
- Move or copy all of your images on your computer to a folder. Ensure that your folder and image file names do not contain any spaces or special characters.
- Compress or zip this folder on your computer.
- Follow the instructions to Upload multiple files at once (including zip files) .
For bulk-uploaded images, be sure to edit each image and add proper metadata for AODA compliance. Photo gallery captions use the text from the Description field.