Tables
Tables should only be used for displaying data in a tabular format. Tables should not be used for layout or arranging elements on a page.
Tables can be difficult for assistive devices such as screen readers to parse, so they should only be used sparingly and only for true tabular data. If you need to layout information in a grid format, try using the multi-row/column content options instead.
The Summary attribute should be used when creating tables to provide a description to the user of what information the table contains and its structure.
Assistive devices such as screen readers cannot decipher how the table should be read (by column or by row or in a matrix formation). Each cell is read individually, so it is important to indicate which column or row contains headings and which contain data, so that reading direction can be determined.
For example:
An example summary for the table below would be Contact information. Table of 2 columns, to be read by row. Column 1 lists names, Column 2 lists phone extensions. The summary field will not appear on the page, but can be read by assistive devices like screen readers.
Sample table:
| Contact information | |
|---|---|
| John Doe | ext. 1234 |
| Jane Doe | ext. 5678 |
Semantic HTML table headings should be used for headings in tables instead of regular text headings.
Regular text headings include H1- to H6-level headings. Headings in tables can be better defined for assistive devices such as screen readers using semantic HTML table cell headings.
How to
- Select the Table icon in the WYSIWYG editor toolbar. Select the number of columns and rows (you can edit this after).

- An empty table will appear. Place your cursor in a cell and add your content.
- Highlight the two cells you want to merge. Ensure that the cells are fully highlighted (not just the text).
- Right click and hover over Cell, then select Merge cells.
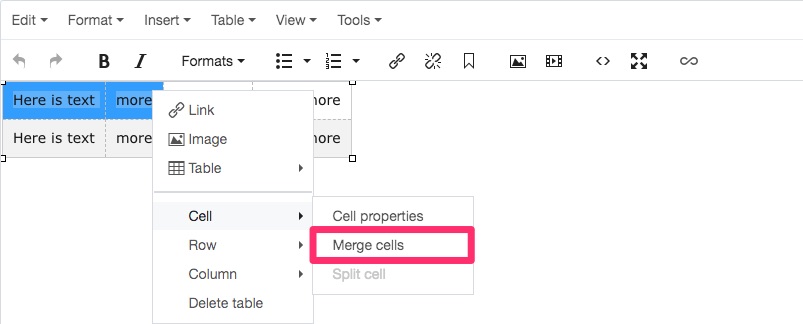
- Highlight the merged cells.
- Right click and hover over Cell, then select Split cells.
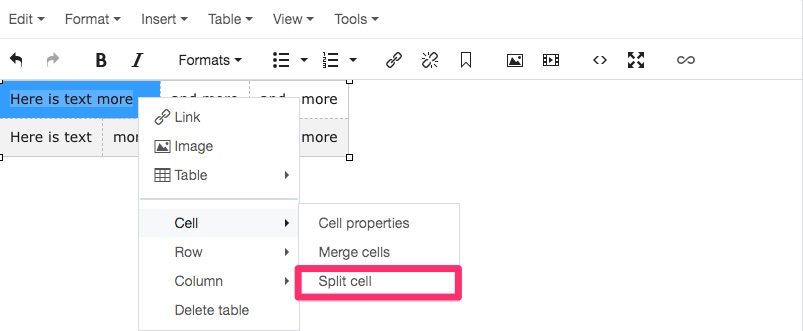
Add a row
- Click inside a cell.
- Right click and hover over Row, them select Insert Row Before to insert a row above the current row, or Insert Row After to insert a row below the current row.
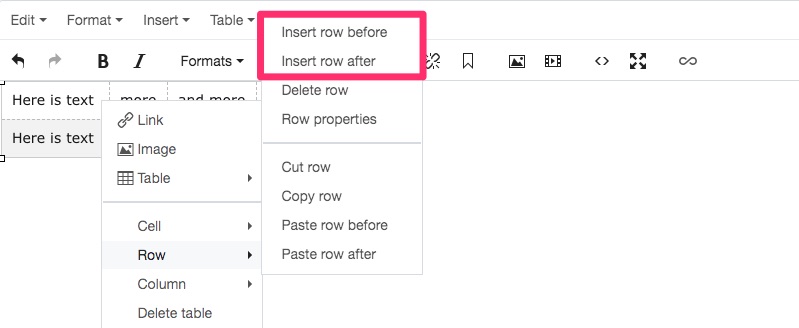
Remove a row
- Highlight the row you want to remove or click inside a cell that is in the row you want to remove.
- Right click and hover over Row, then select Delete row.
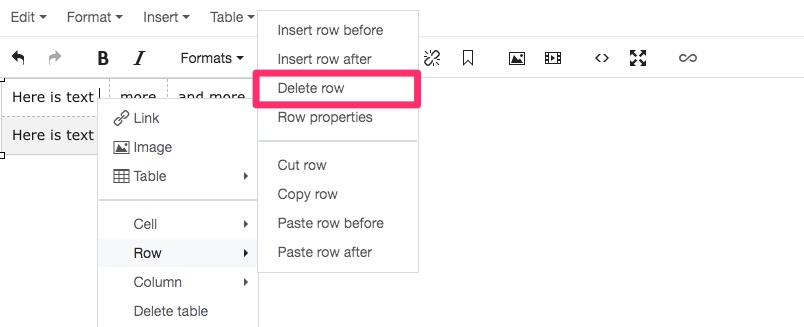
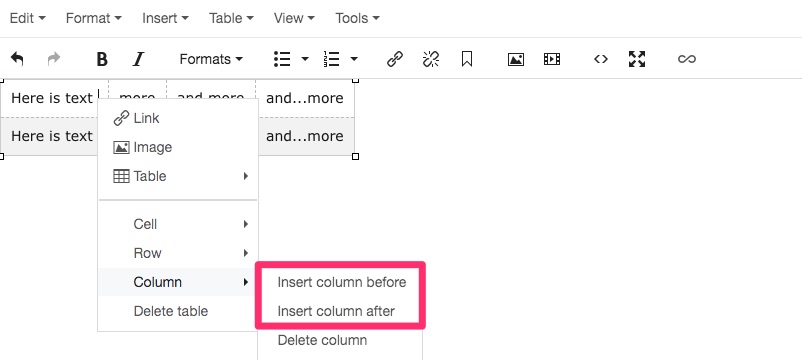
Add a column
- Click inside a cell.
- Right click and hover over Column, then select Insert column before to insert a column before the current column, or Insert column after to insert a column after the current column.
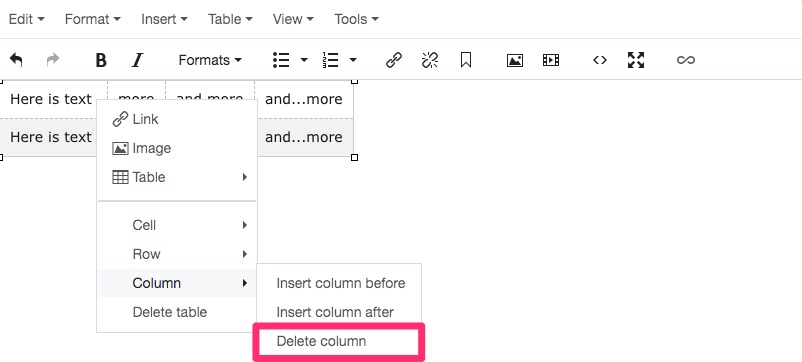
Delete a column
- Highlight the column you want to remove or click inside a cell that is in the column you want to remove.
- Right click and hover over Column, then select Delete column.
There are several style options to choose from when creating tables. By default, tables will have an outside border, no cell borders, rows will alternate between white and light grey, and the width will automatically adjust to the cell contents (unless set widths are specified on columns).
The available style options are listed and described below. You can have one or several styles "chained" together on a single table.
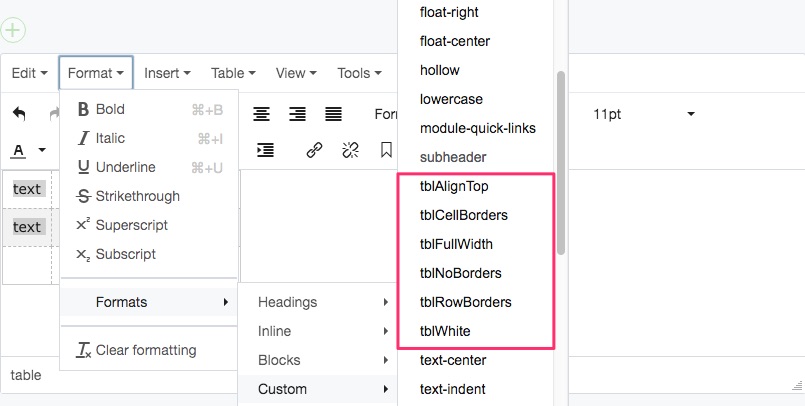
tblFullWidth - The table will span the full width of the content area.

tblWhite - All cell backgrounds will be white; rows will not alternate between white and light grey.

tblNoBorders - Remove the default outside border around the table.

tblCellBorders - Add a border around each cell.

tblRowBorders - Add borders only to the rows (tblCellBorders should not be selected).

tblAlignTop - Aligns multi-line text in each cell to the top (the default is the middle of the cell).

How to
Add styles to a table
- Create your table and add your content.
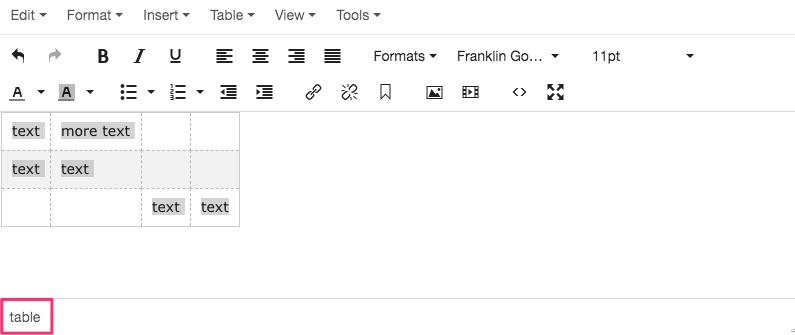
- Highlight the entire table so that all the text is highlighted and 'table' appears in the WYSIWYG editor footer.
- Select the Formats dropdown, then Custom and select a table style, which begins with 'tbl'.
- To add or chain another style to the table, repeat the steps above.
Example of table with tblFullWidth, tblWhite, tblNoBorders, and tblRowBorders applied:

Formatting tables in the WYSIWYG editor can be tricky. Please contact us if your table is not displaying as you intended. Make a note in the comments section when you submit the page to the workflow.
- Review the accessibility guidelines for tables .
- Use proper table cell headings and other HTML formatting to make a table more accessible. Instead of using regular text headings or bolded text in tables, you can use semantic HTML table headings.
- Right-click in a table cell and select Cell > Cell properties.
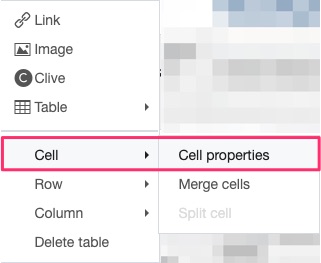
- In the Cell Type dropdown, select Header cell.
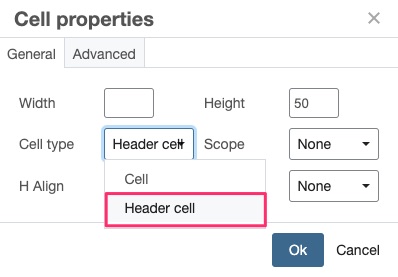
- Click Ok to save your changes.
- Right-click in a table cell and select Cell > Cell properties.
- When you submit the page and perform a content review, the CMS will scan your page for basic accessibility. Tables that do not contain a summary will be flagged as an accessibility error.

- Select Fix to add a table summary. Enter your table summary in the field provided.
Contact us if you require further assistance with styling or creating accessible tables.