Modifying menu items
Menu items are controlled by the site structure in the CMS sidebar. Be sure to review the information about how websites are structured before proceeding further on this page.
How to
-
Add a page or menu subsection
- Follow the instructions for creating content: menu subsection or page.
-
Re-name a page or menu subsection
Assets (pages, folders, or files) in the CMS have various fields that control the name of the asset in the website's navigation menu, the title of the page, and the URL of live asset. To move or rename assets, you will need to update one or more of the following fields:
Edit the Display Name or Title
Display Name - (metadata field) the name of a page or asset that appears in the navigation menu. This is typically the same as the Title of the page, unless the Title is too long, in which case a shortened version is used for the Display Name. The Display Name is usually used to generate the File Name in the CMS.
Title - (metadata field) the full name of a page that appears on the web page (the title at the top of the page content).
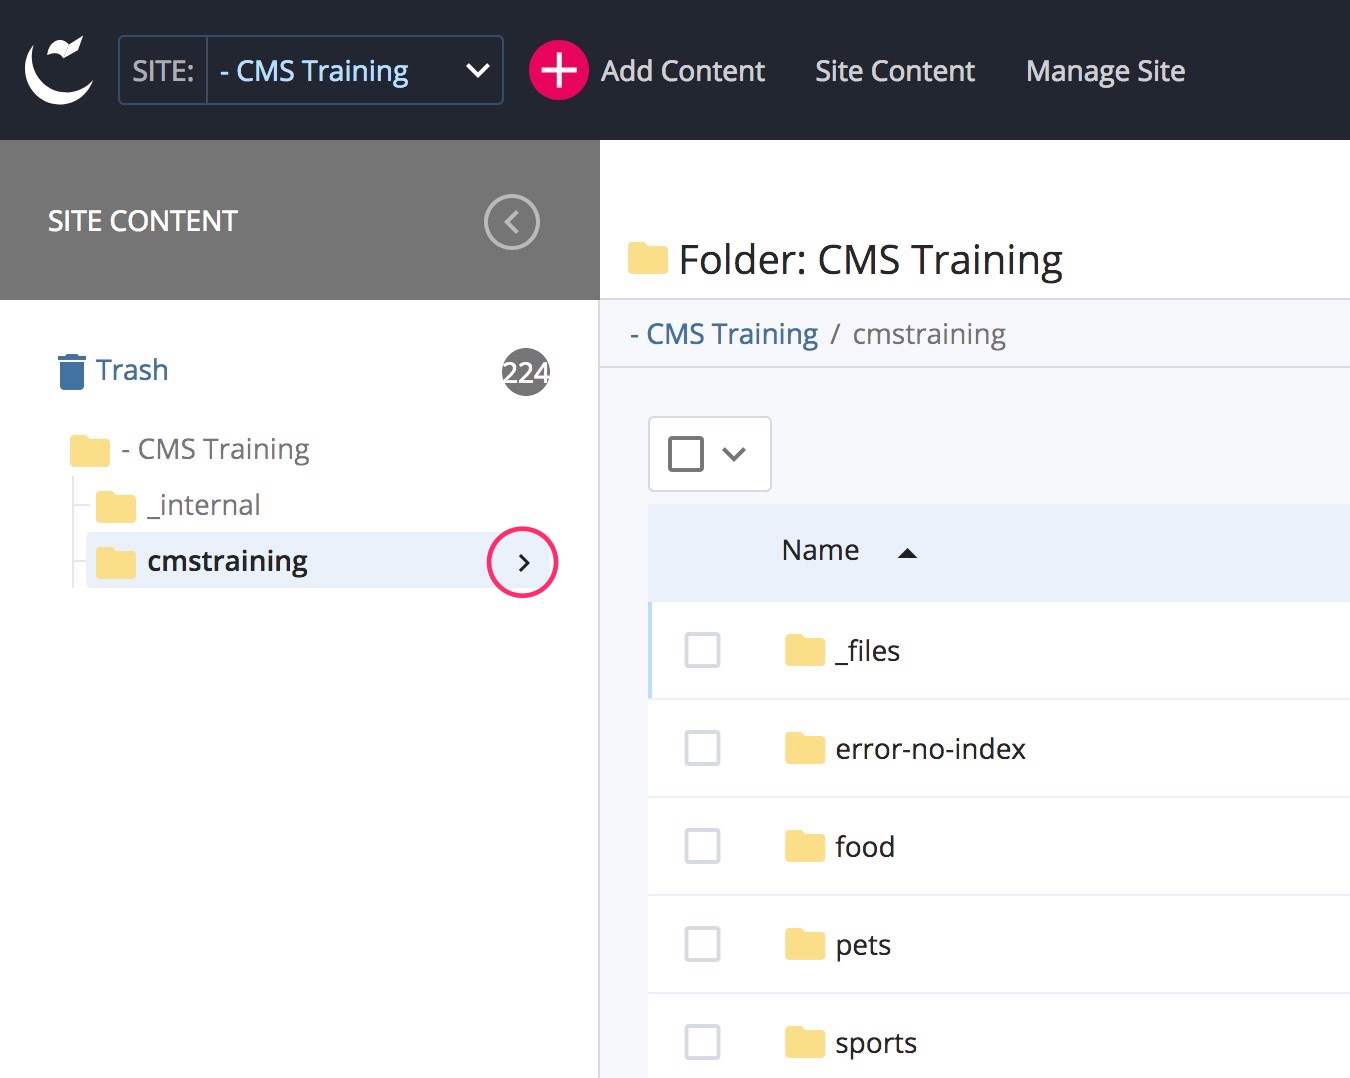
- Browse to the page or folder in the Site Content menu and select it. If you are modifying a folder, hover over the folder name until the chevron on the right appears, then click the chevron.
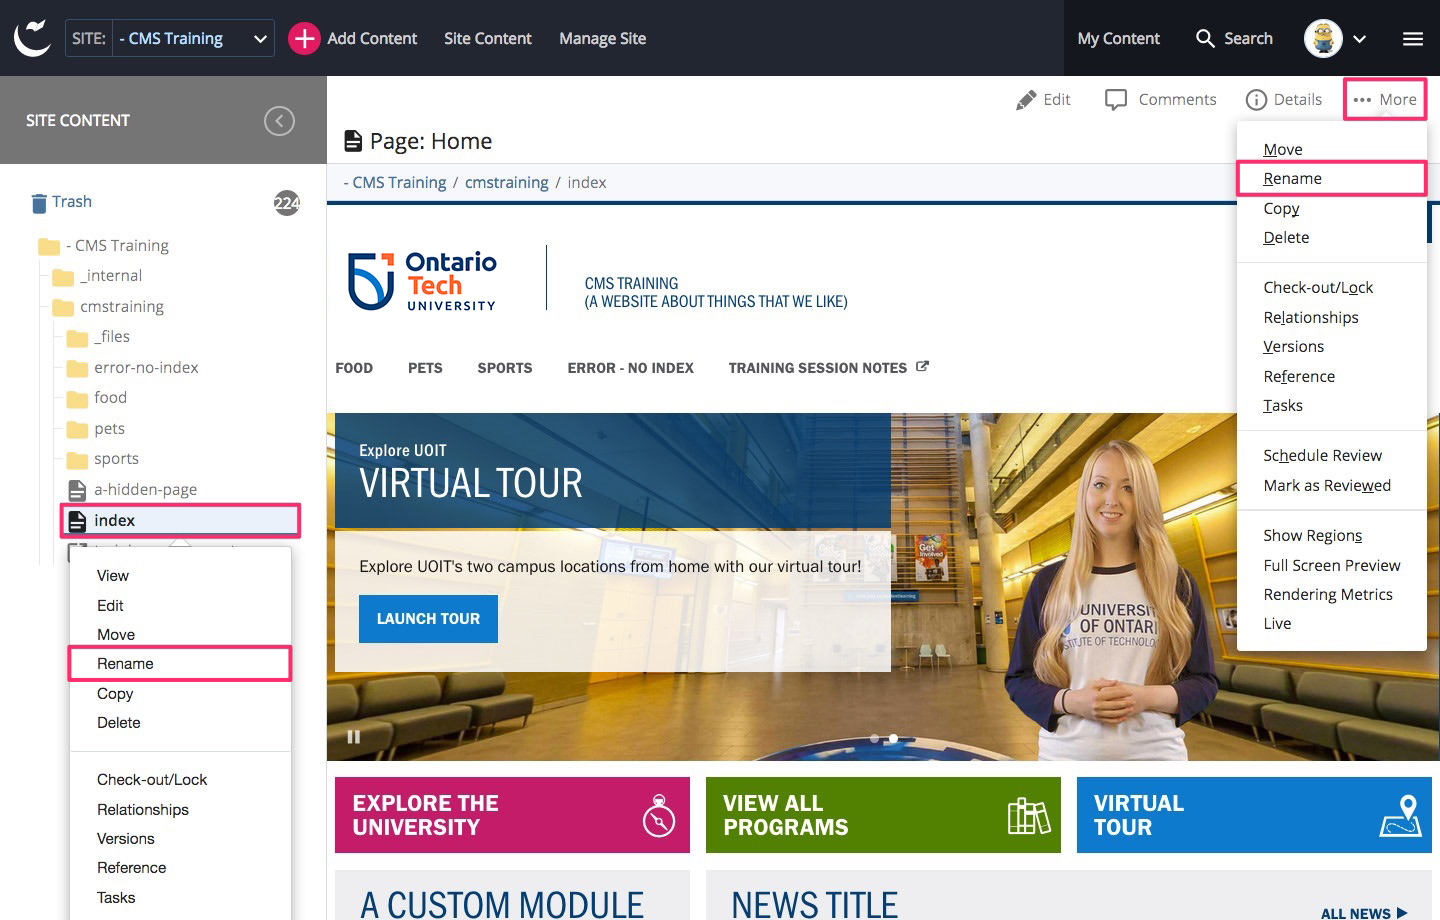
- Select Edit from the asset editing toolbar.

- Edit the Title and/or Display Name fields to adjust what appears on the page and navigation menus, respectively.
Edit the URL (File Name)
File Name - the name of the asset (folder/page/file) in the CMS Site Content menu. (Formerly known as the System Name). The file name is what appears in the live URL so it should not contain any spaces or special characters. The file name is usually generated from the Display Name.
- Browse to the page or folder in the Site Content menu and select it. If you are modifying a folder, hover over the folder name until the chevron on the right appears, then click the chevron.
- Right-click the page or folder and select Rename, or select More from the asset editing toolbar, then Rename.
- Update the File Name, being sure to following naming conventions for URLs (lowercase, no spaces, dashes in place of spaces).
When a page or folder is moved and/or renamed, be sure to unpublish the asset from the live site as well. Otherwise, the asset at the old URL/location will still exist on the live site, even though it has been moved/renamed in the CMS. If you are unsure of how to unpublish an asset from the live site, contact us.
- Browse to the page or folder in the Site Content menu and select it. If you are modifying a folder, hover over the folder name until the chevron on the right appears, then click the chevron.
-
Re-order a page/subsection in the navigation menu
- Select the parent folder of the page or subfolder you want to re-order (hover over the folder name until the chevron on the right appears, then click the chevron).
- Select the Order tab. The current order of the folder contents will be displayed.
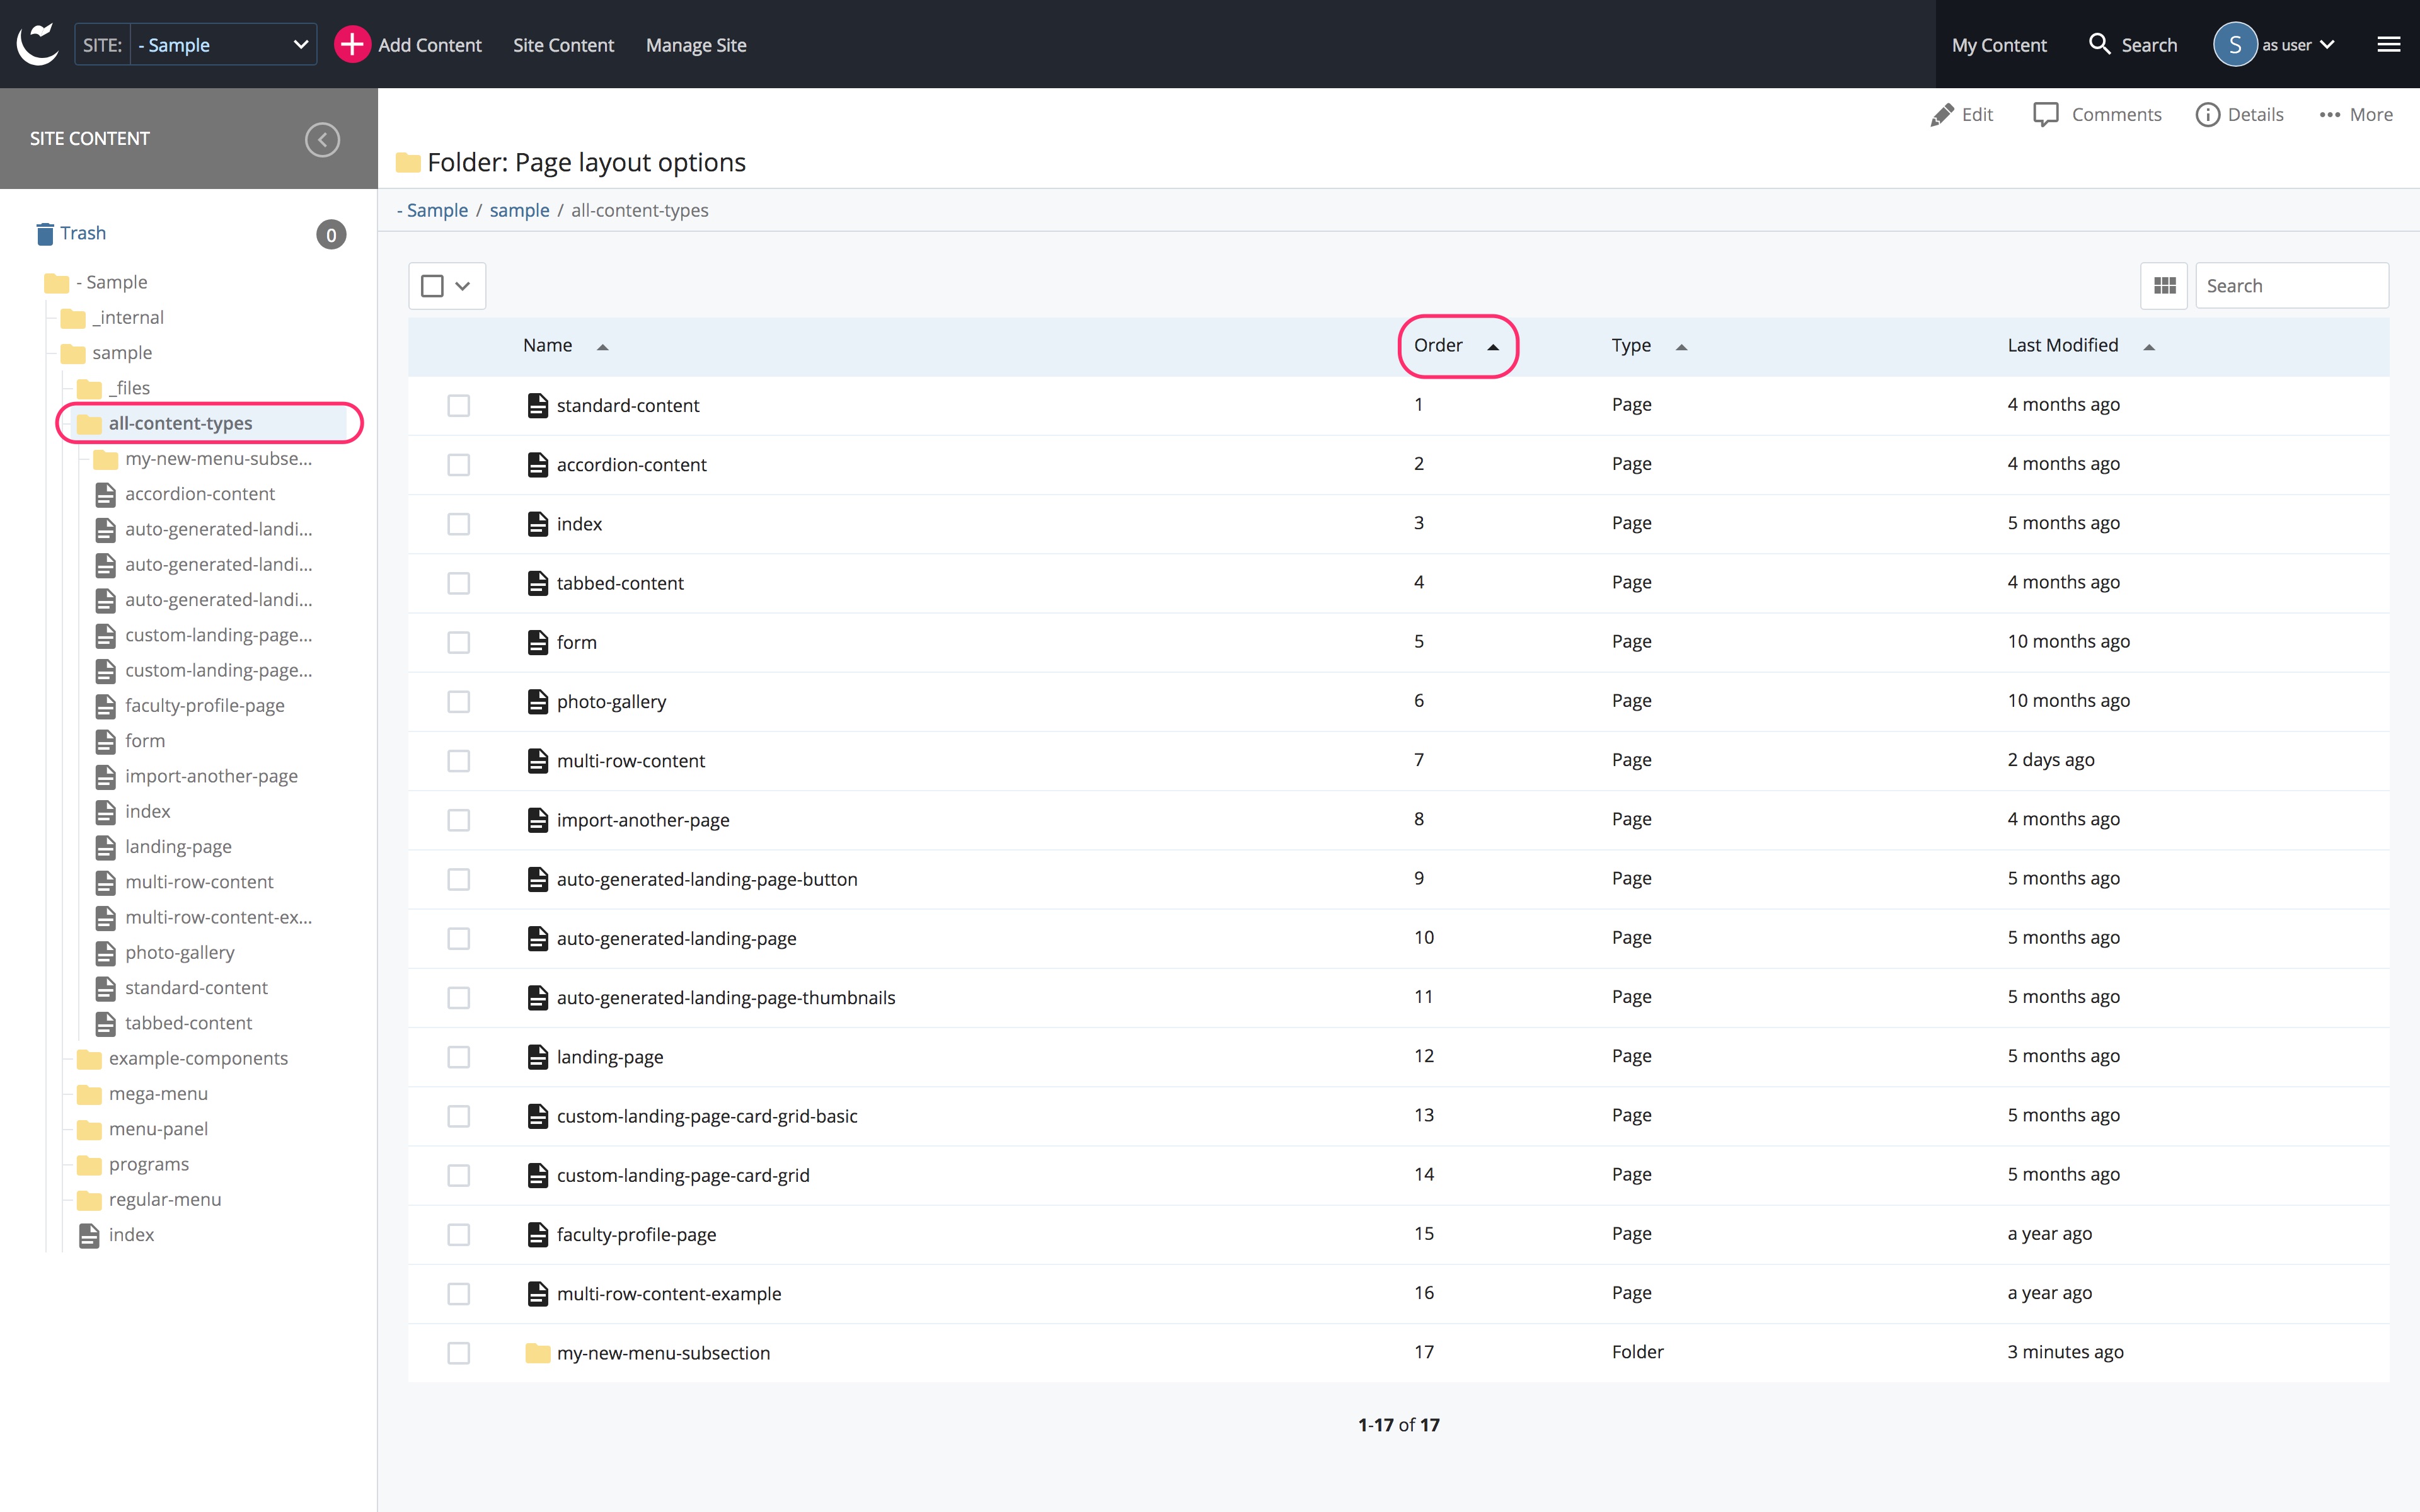
- Drag and drop the folder items into the correct order, or select an individual item and use the up/down arrows at the top of the list to re-order the item.
- The navigation menu will need to be republished.
- If you have publishing abilities, re-publish the navigation menu (“_files” folder), or
- ask your website publisher/the Web Team to re-publish the navigation menu, or
- wait until another page has gone through the workflow process to see the menu changes on the live site (the navigation menu is automatically re-published when a workflow is completed).
-
Delete a page or menu subsection
- Browse to the page or folder you want to delete in the Site content menu and select it.
- Right-click the page or folder you want to delete and select Delete, or select More from the asset editing toolbar, then Delete.
- Begin the workflow process to delete the page or folder.
When a page or folder is deleted from the CMS, be sure to also unpublish the page or folder from the live site as well. Otherwise the page or folder at the old URL/location will still exist on the live site, even though it has been deleted from the CMS. If you are unsure of how to unpublish an asset from the live site, contact us.
-
Archive a page or menu subsection
Archiving a page or menu subsection deletes it from the live website, but keeps a copy in the CMS for reference or future re-publishing.
- If you have publishing abilities, un-publish the page or folder, or ask your website publisher/the Web Team to un-publish the page or folder.
- Select the page or folder you want to delete in the Site content menu.
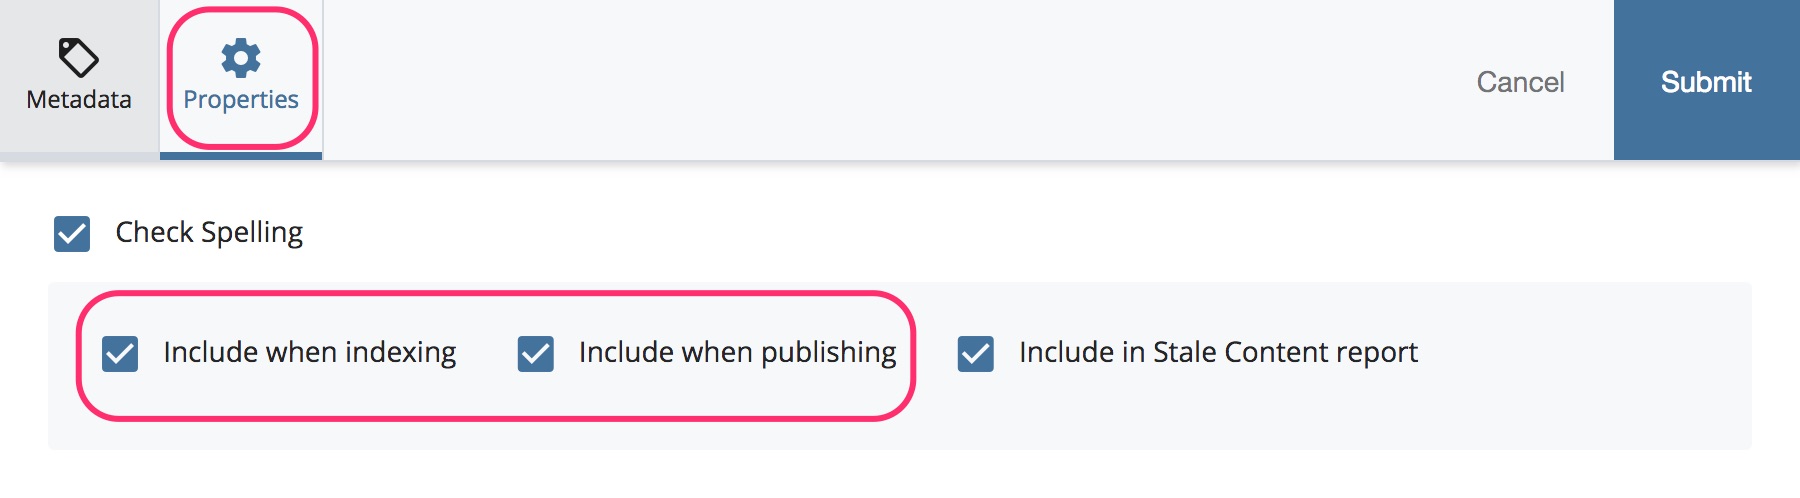
- Select Edit and select the Properties tab.
- Uncheck Include when indexing and uncheck Include when publishing.
- Submit the changes. The page or folder will no longer be publishable (unless you undo these changes).
- You can also update the File Name of the page or folder so site content editors can quickly see that this is an archived page or folder. For example, you can rename a page from my-page-name to _my-page-name-archived. (The prefixed underscore is a common naming convention in the CMS for archived versions.)