Workflows
A workflow is a series of ordered steps that content must go through for quality assurance. The content is approved before being published to the live website. Having multiple checks by multiple people ensures accurate content, which is presented in a professional and consistent manner.
When a page is ready to be submitted for review, the workflow process is initiated. Once a page is in the workflow process, no further edits can be made on the page—the page will be locked from further edits. This ensures multiple edits on the same page cannot be submitted simultaneously.

Administrators are Communications and Marketing Web Team developers. Publishers are typically Communications and Marketing Communications Officers. Most users will be in a contributor or approver role. A typical workflow setup is outlined on this page, but the workflow on your website might be different depending on the site editors and the agreement established with Communications and Marketing.
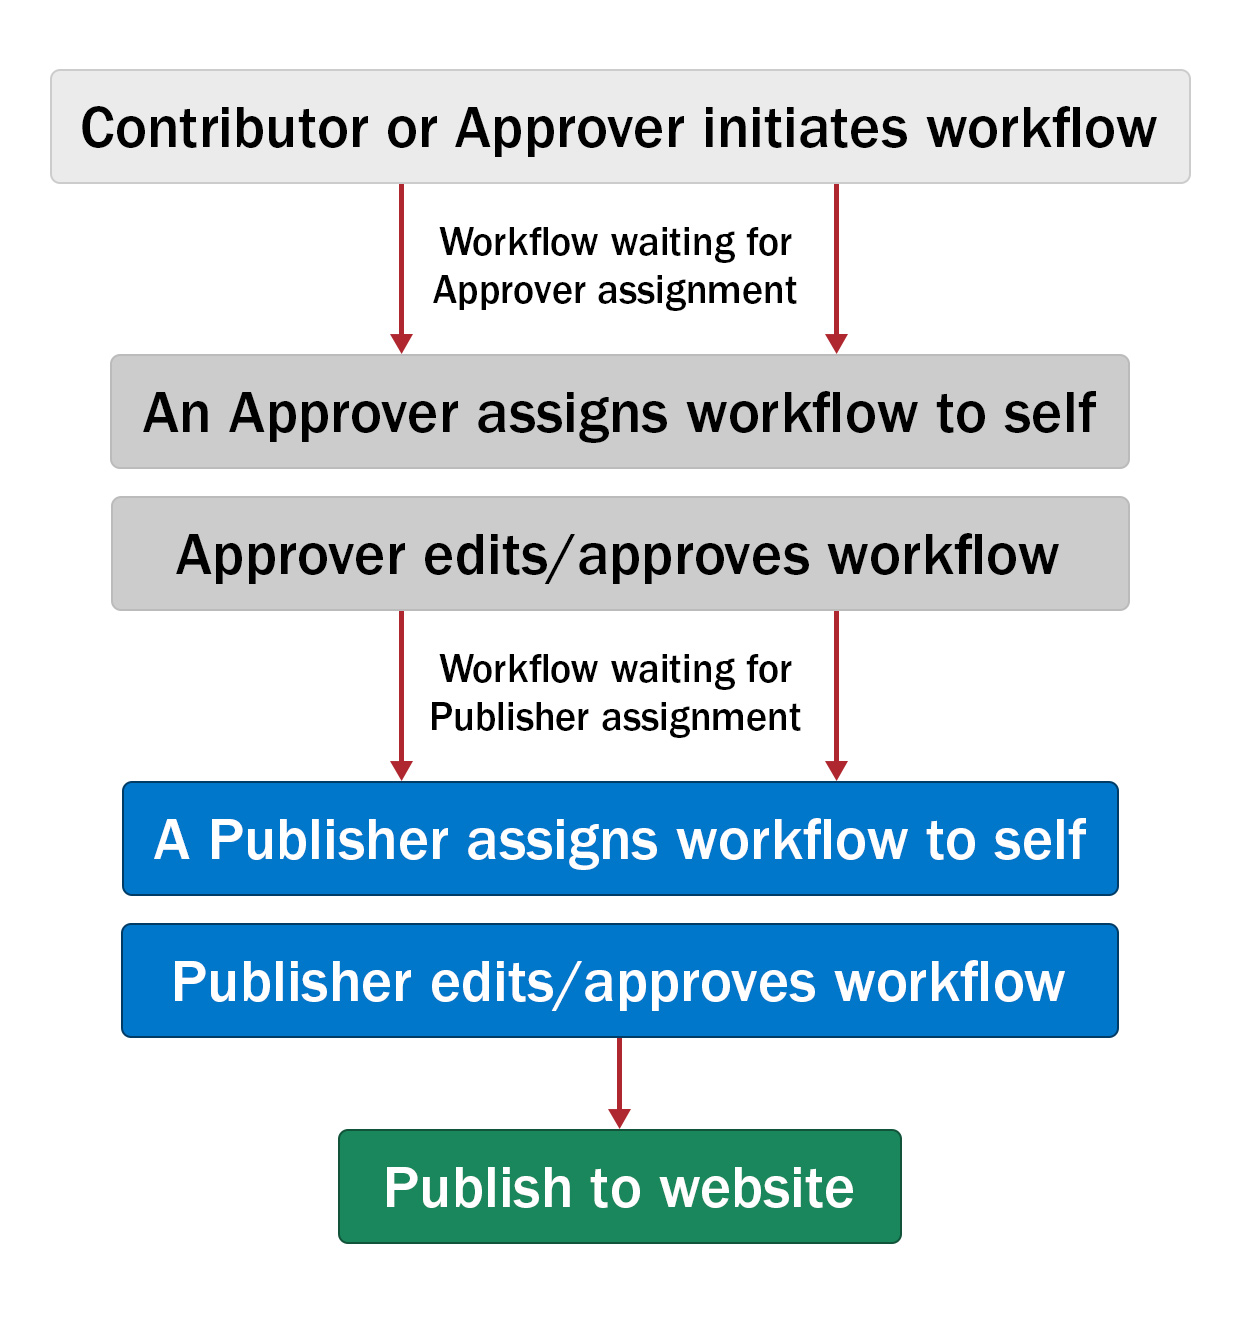
Detailed workflow steps for a typical website workflow setup:

Note: most workflows don't reach the Web Team (if there aren't any technical issues with a page, it's usually approved and published before this step). If you have any questions about an overdue or urgent workflow, contact the publishers for your site.
How to
Start a workflow
- On the page preview, Submit your page edits or draft to start the workflow process.

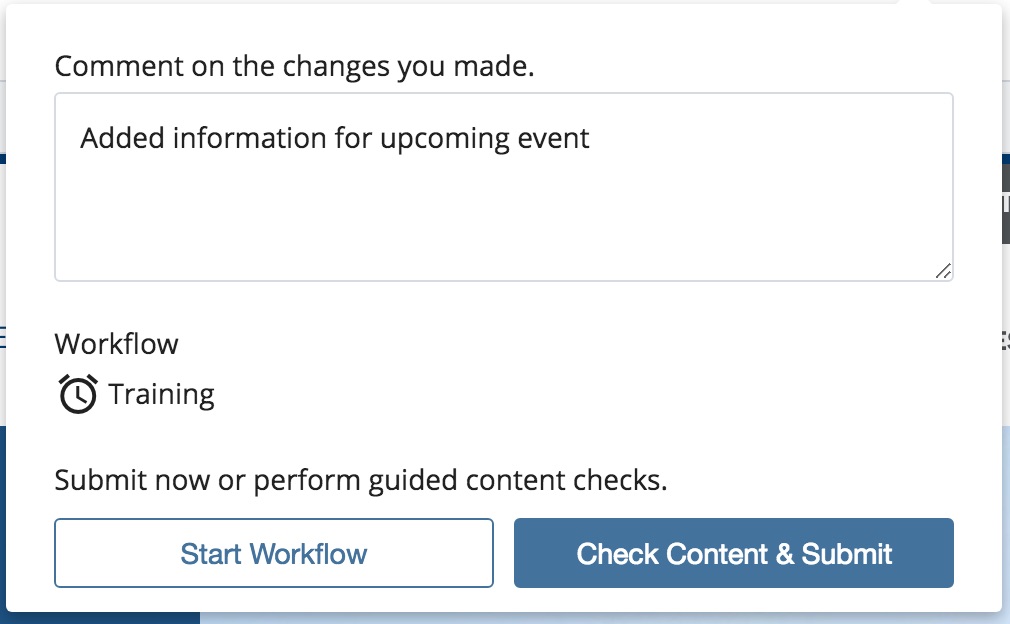
- Enter a relevant comment for your page edits. Select Start Workflow or Check Content & Submit.

- Start Workflow - skips any spelling, broken link, and basic accessibility checks.
- Check Content & Submit - checks your content for spelling, broken links, and basic accessibility.
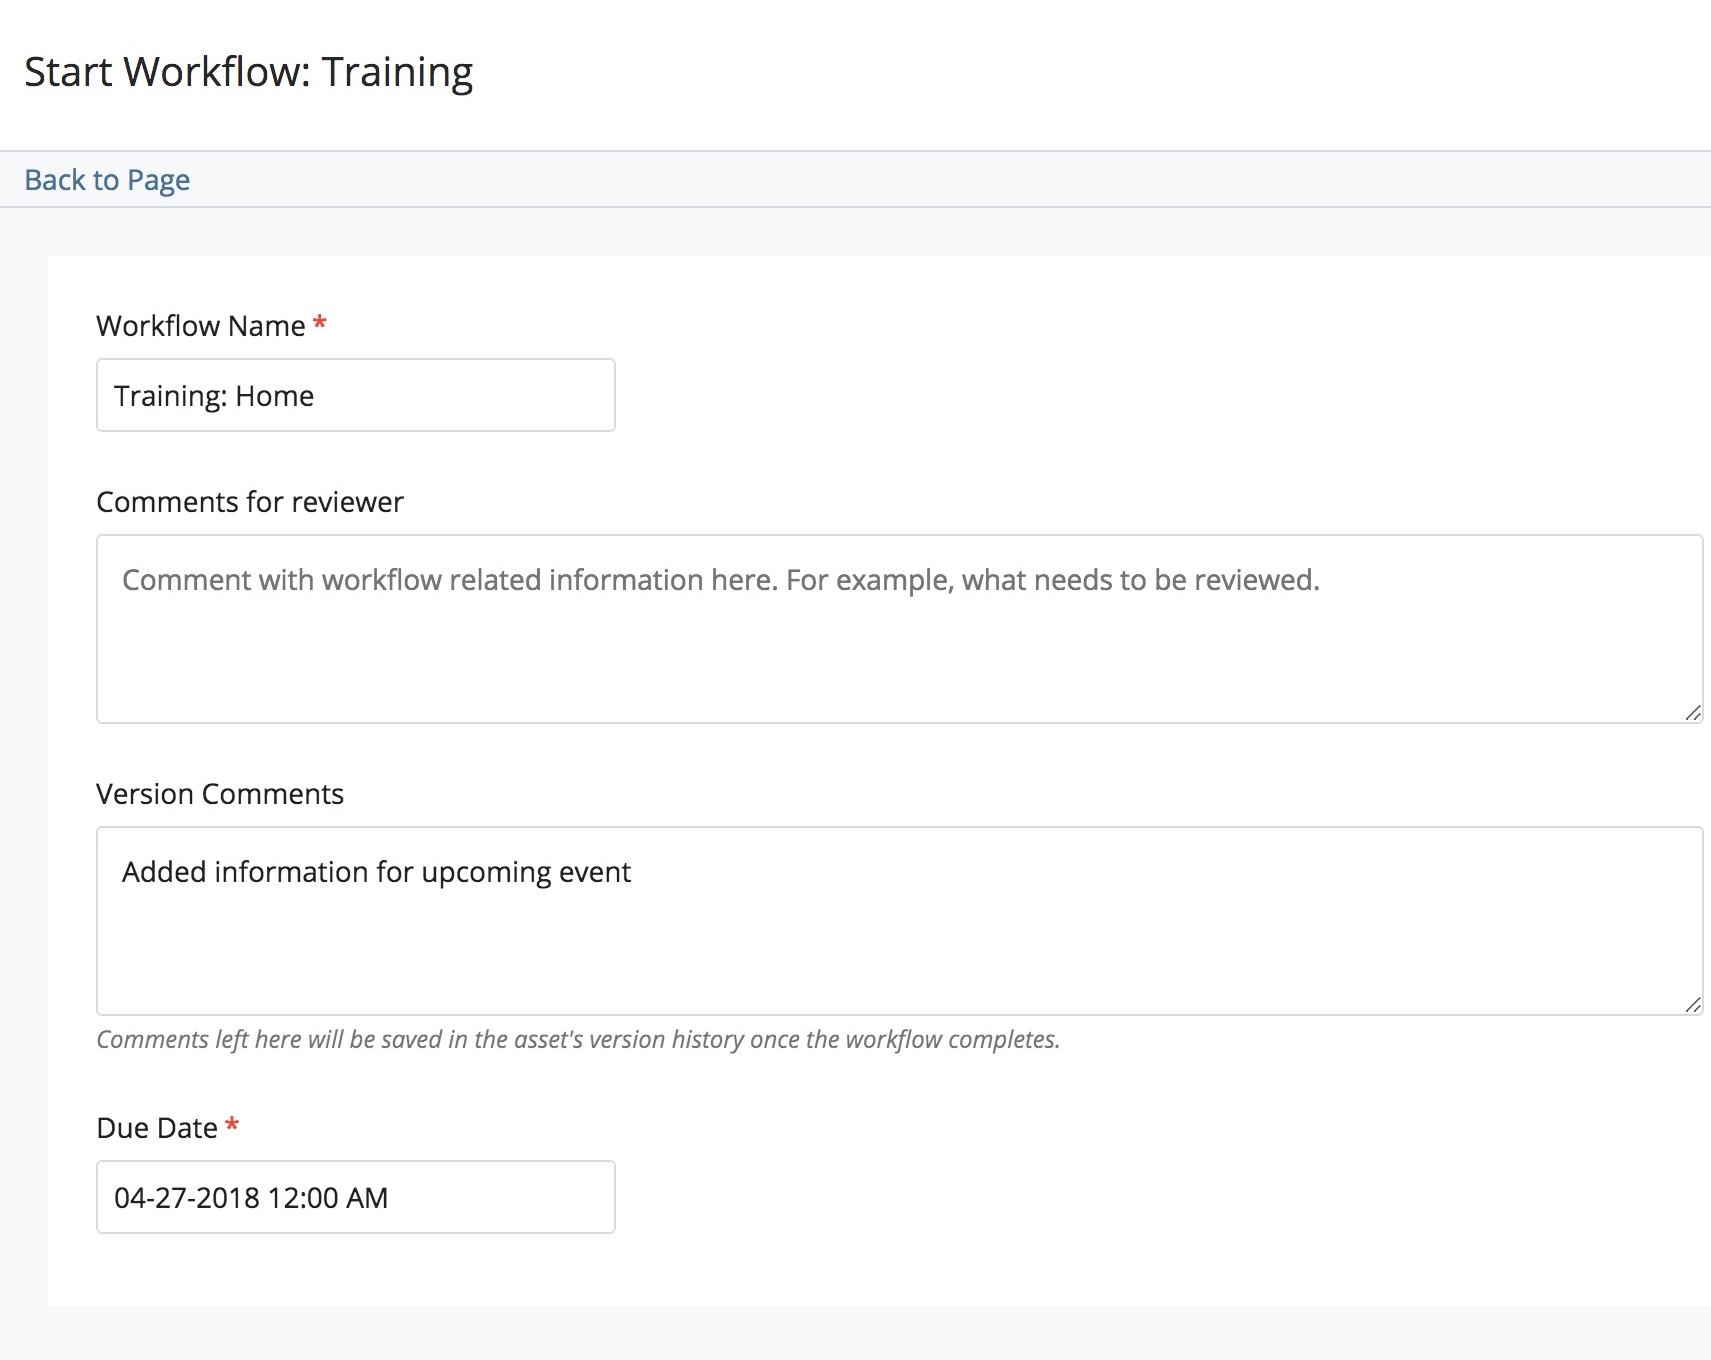
- The Start Workflow screen will appear.

- Workflow Name - automatically populated with the site's workflow name and the page name. The workflow name should not be altered.
- Comments for reviewer - (optional) comments for reviewers, such as workflow-related information, questions, or feedback
For example:
Please review the table format. - Version Comments - comments about what changed for this version. Version comments should be entered so that the next person viewing the page knows what and where the changes are.
For example:
If a new page is being created, enter New page.
If a page is being edited, enter something like Added information for upcoming event. - Due Date - the workflow due date. A date can be entered, but keep in mind that this does not necessarily mean that the workflow will be completed by this date. If a page needs to be published by a specified date, contact your site approver(s) or publisher(s). If you are unsure of who the approver(s) or publisher(s) are for your site, contact us.
- Submit the workflow. Email notifications will be sent to all approvers who are members of your website's approver group. The workflow is now with your website’s approver group and is waiting for ownership. Any approver for your website can now edit and approve the page by taking ownership of the workflow (assigning it to themselves).
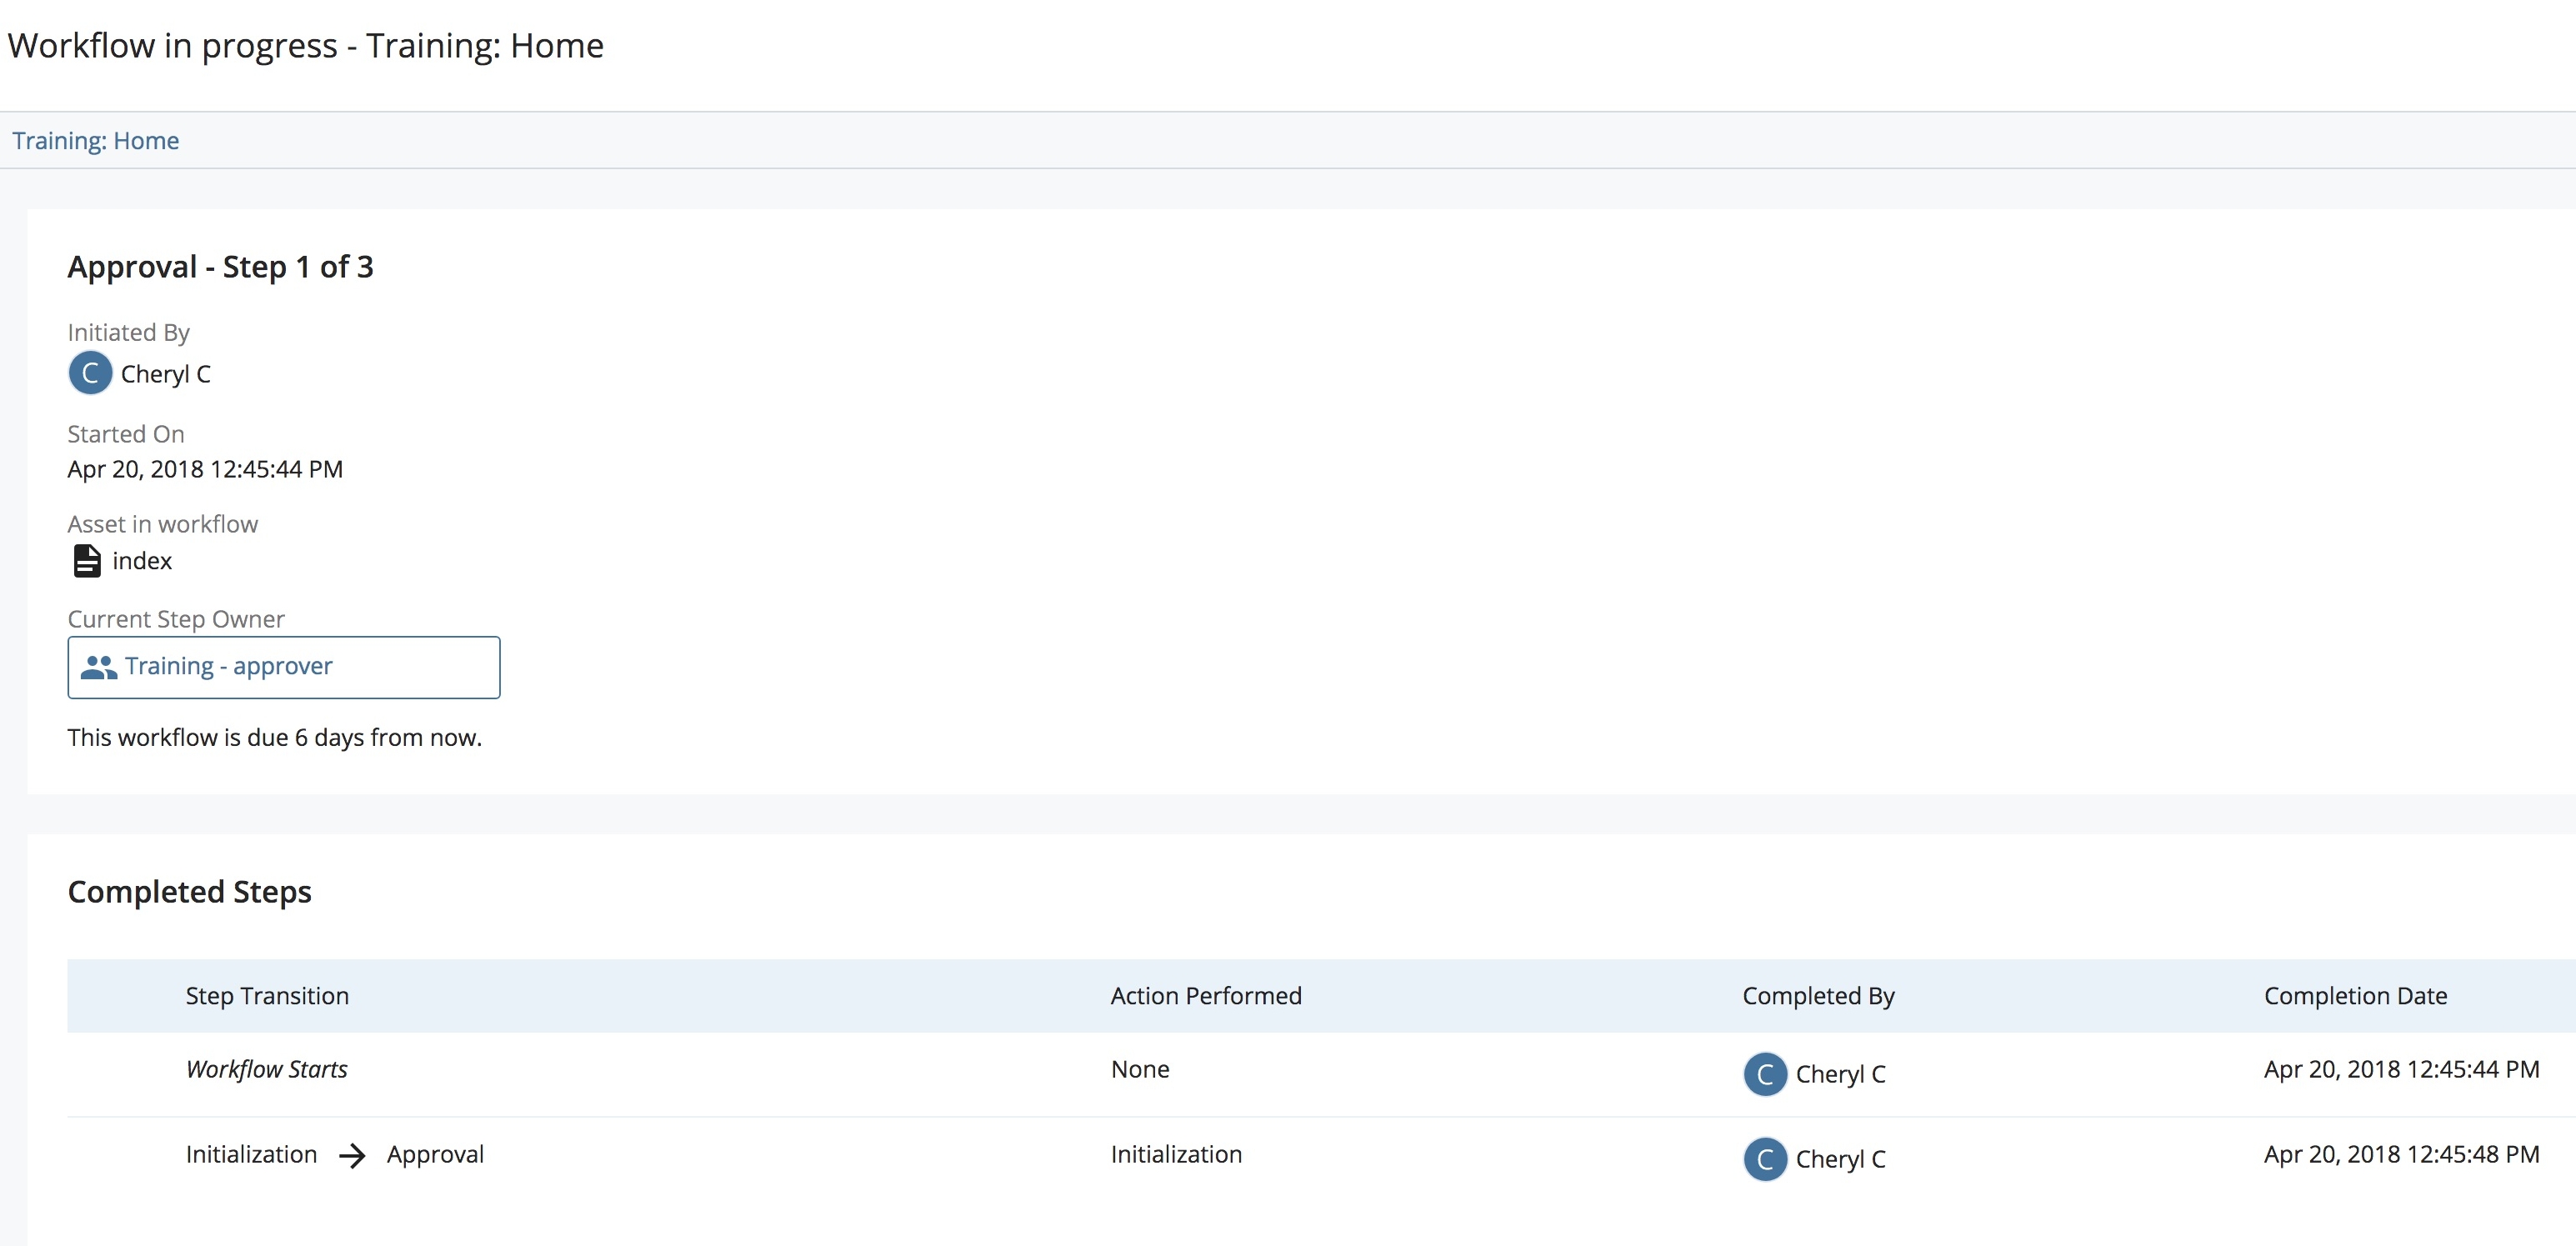
- On the workflow screen, you will see a list of the Completed Steps thus far. The Current Step Owner field indicates which group or person the workflow is with. Contact someone in the specified group (your site approvers or publishers) if you need your page moved along in the workflow process.

- Once the workflow completes, your page changes will now be active on the live website. You'll receive an email notification when your workflow is approved and published.