CMS interface
This page provides an overview of the CMS interface and the areas you will be accessing most frequently.
The Dashboard
When you login to the CMS, you will be viewing the dashboard. The dashboard is comprised of multiple widgets that give you an overview of your action items, notifications, and site content. You can add or customize widgets to reflect data from one or more of your sites.
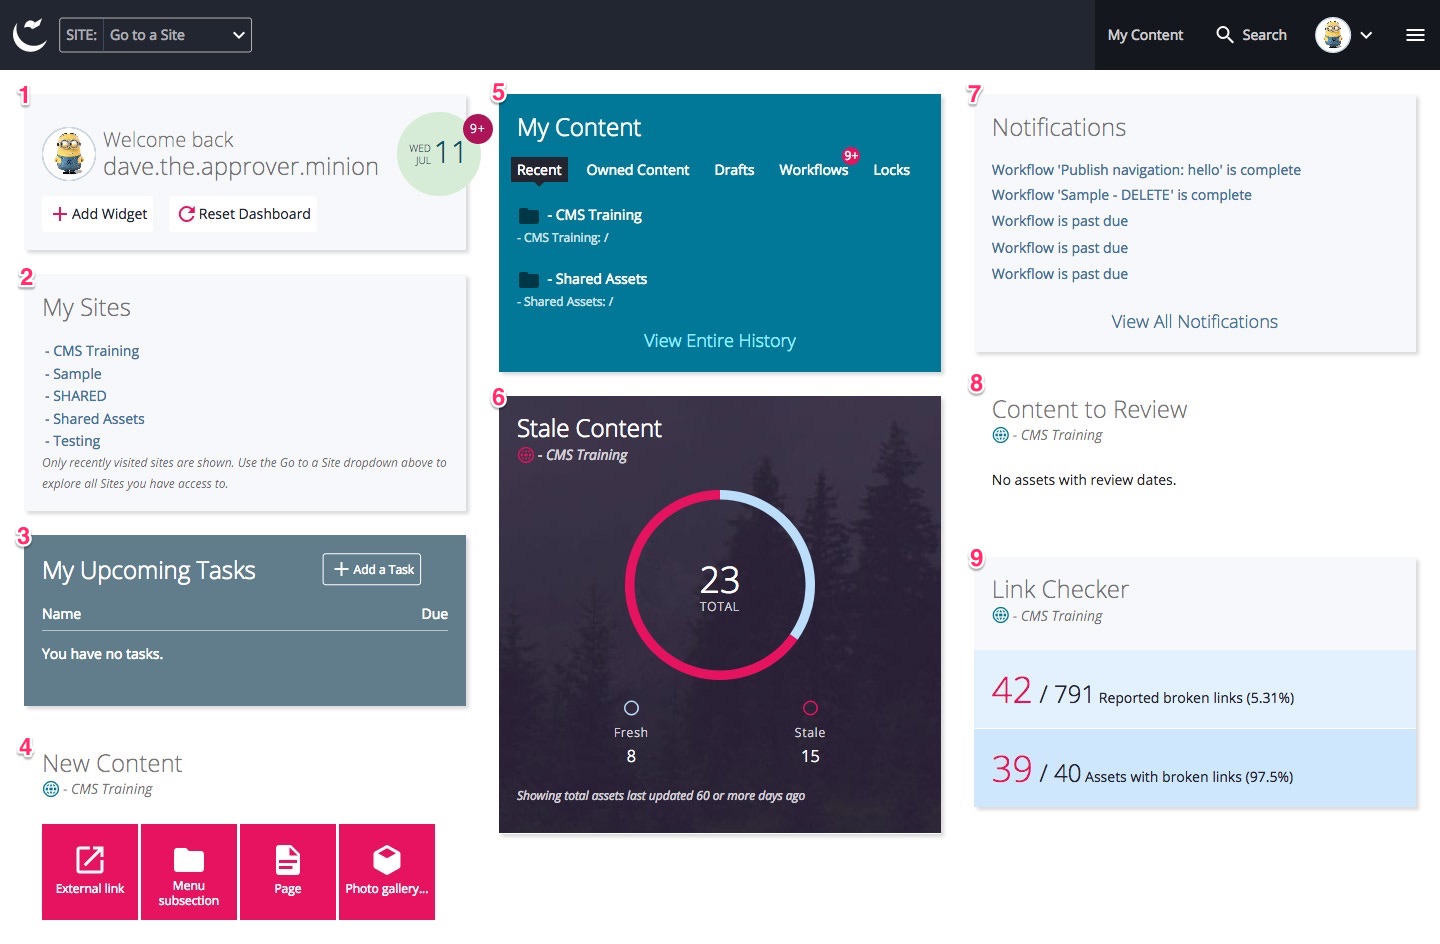
By default, the dashboard includes the following widgets:
- Welcome - you can add widgets or reset your dashboard from the Welcome widget. If you have unread notifications, you can click the badge on the date in this widget to view them.
- My Sites - sites you've recently visited will be listed here. Click any of them to switch into the site, or use the Site dropdown menu to view all sites you have access to.
- My Upcoming Tasks - tasks assigned to you will be listed here in order of their due date.
- New Content - create new assets right from the dashboard by clicking on any of the New Content Creator buttons in this widget.
- My Content - quickly access your recently-viewed assets, owned content, drafts and working copies, and workflows from this widget. If you have workflows waiting on you or one of your groups, you'll see a badge on the Workflows tab.
- Stale Content - keep your content fresh by monitoring stale assets that haven't been updated in a while.
- Notifications - your most recent notifications such as workflow notifications, publish reports, and user mentions will be listed here.
- Content to Review - assets with upcoming review dates will be listed here.
- Link Checker - if a broken link check is scheduled for your site(s), the number of broken links and assets with broken links found will be displayed here.
The Main Toolbar
The main toolbar appears at the top of every page in the CMS. From here, you can access your site(s) and content, add new content, search and view your history, and edit your user settings.

Components of the main toolbar:
- Dashboard/Cascade link - get back to the Dashboard from any screen in the CMS.
- Site dropdown menu - select a site to edit from the dropdown menu in the top left corner. You can also type in this field to filter by site name. Your most recently-viewed site, if you have one, will appear first on the list for easy access.
- Add Content - add new content on the site you are currently viewing.*
- Site Content - view your site content.*
- Manage Site - if applicable, manage your site settings and access Publish Sets here.*
- My Content - access all of your recently-viewed assets, owned content, drafts and working copies, and workflows from this menu item.
- Search - click in the field to see a list of your recently-viewed assets, or type in the field to search the CMS for a specific asset.
- User Menu - change basic user preferences, view your history, notifications, tasks, and sign out.
- Settings - change your user preferences, change your password, and change your profile photo.
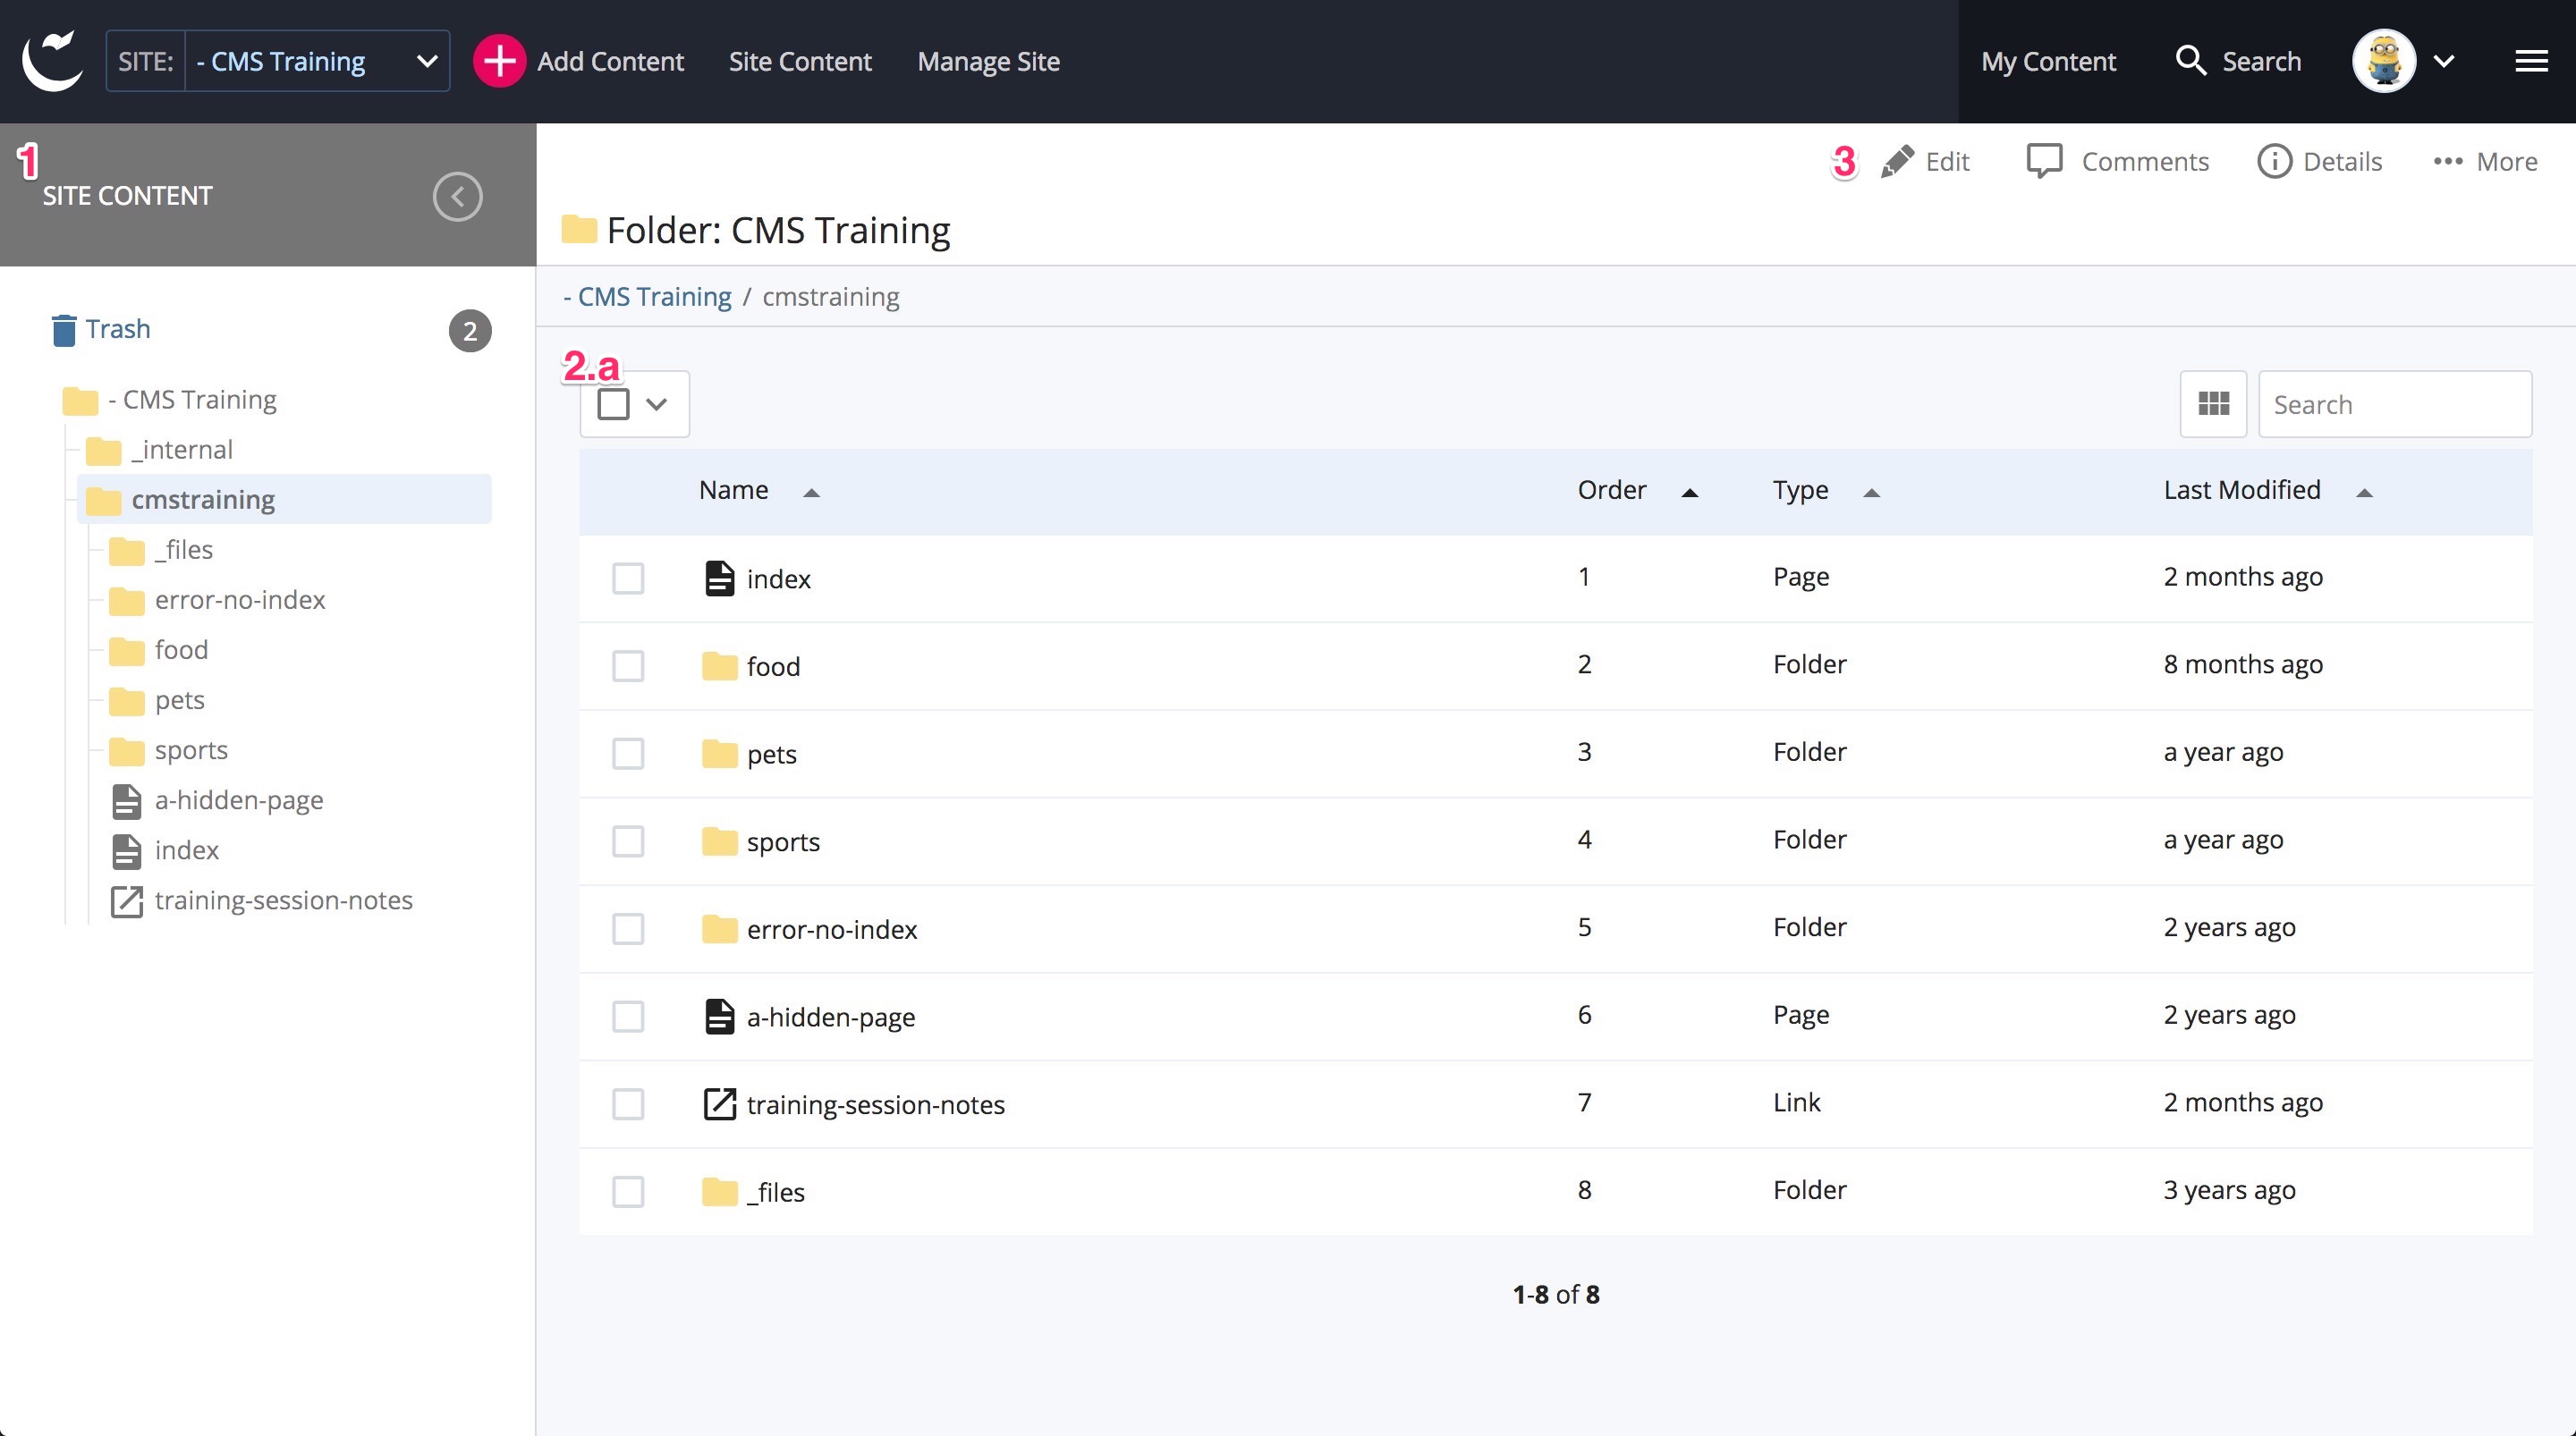
Site view and the asset editing toolbar
Select a site to which you have editing access from the Site dropdown menu. Once on the site, your screen will show the following (note that the actual site content folders, pages and preview will be different from the screenshot below):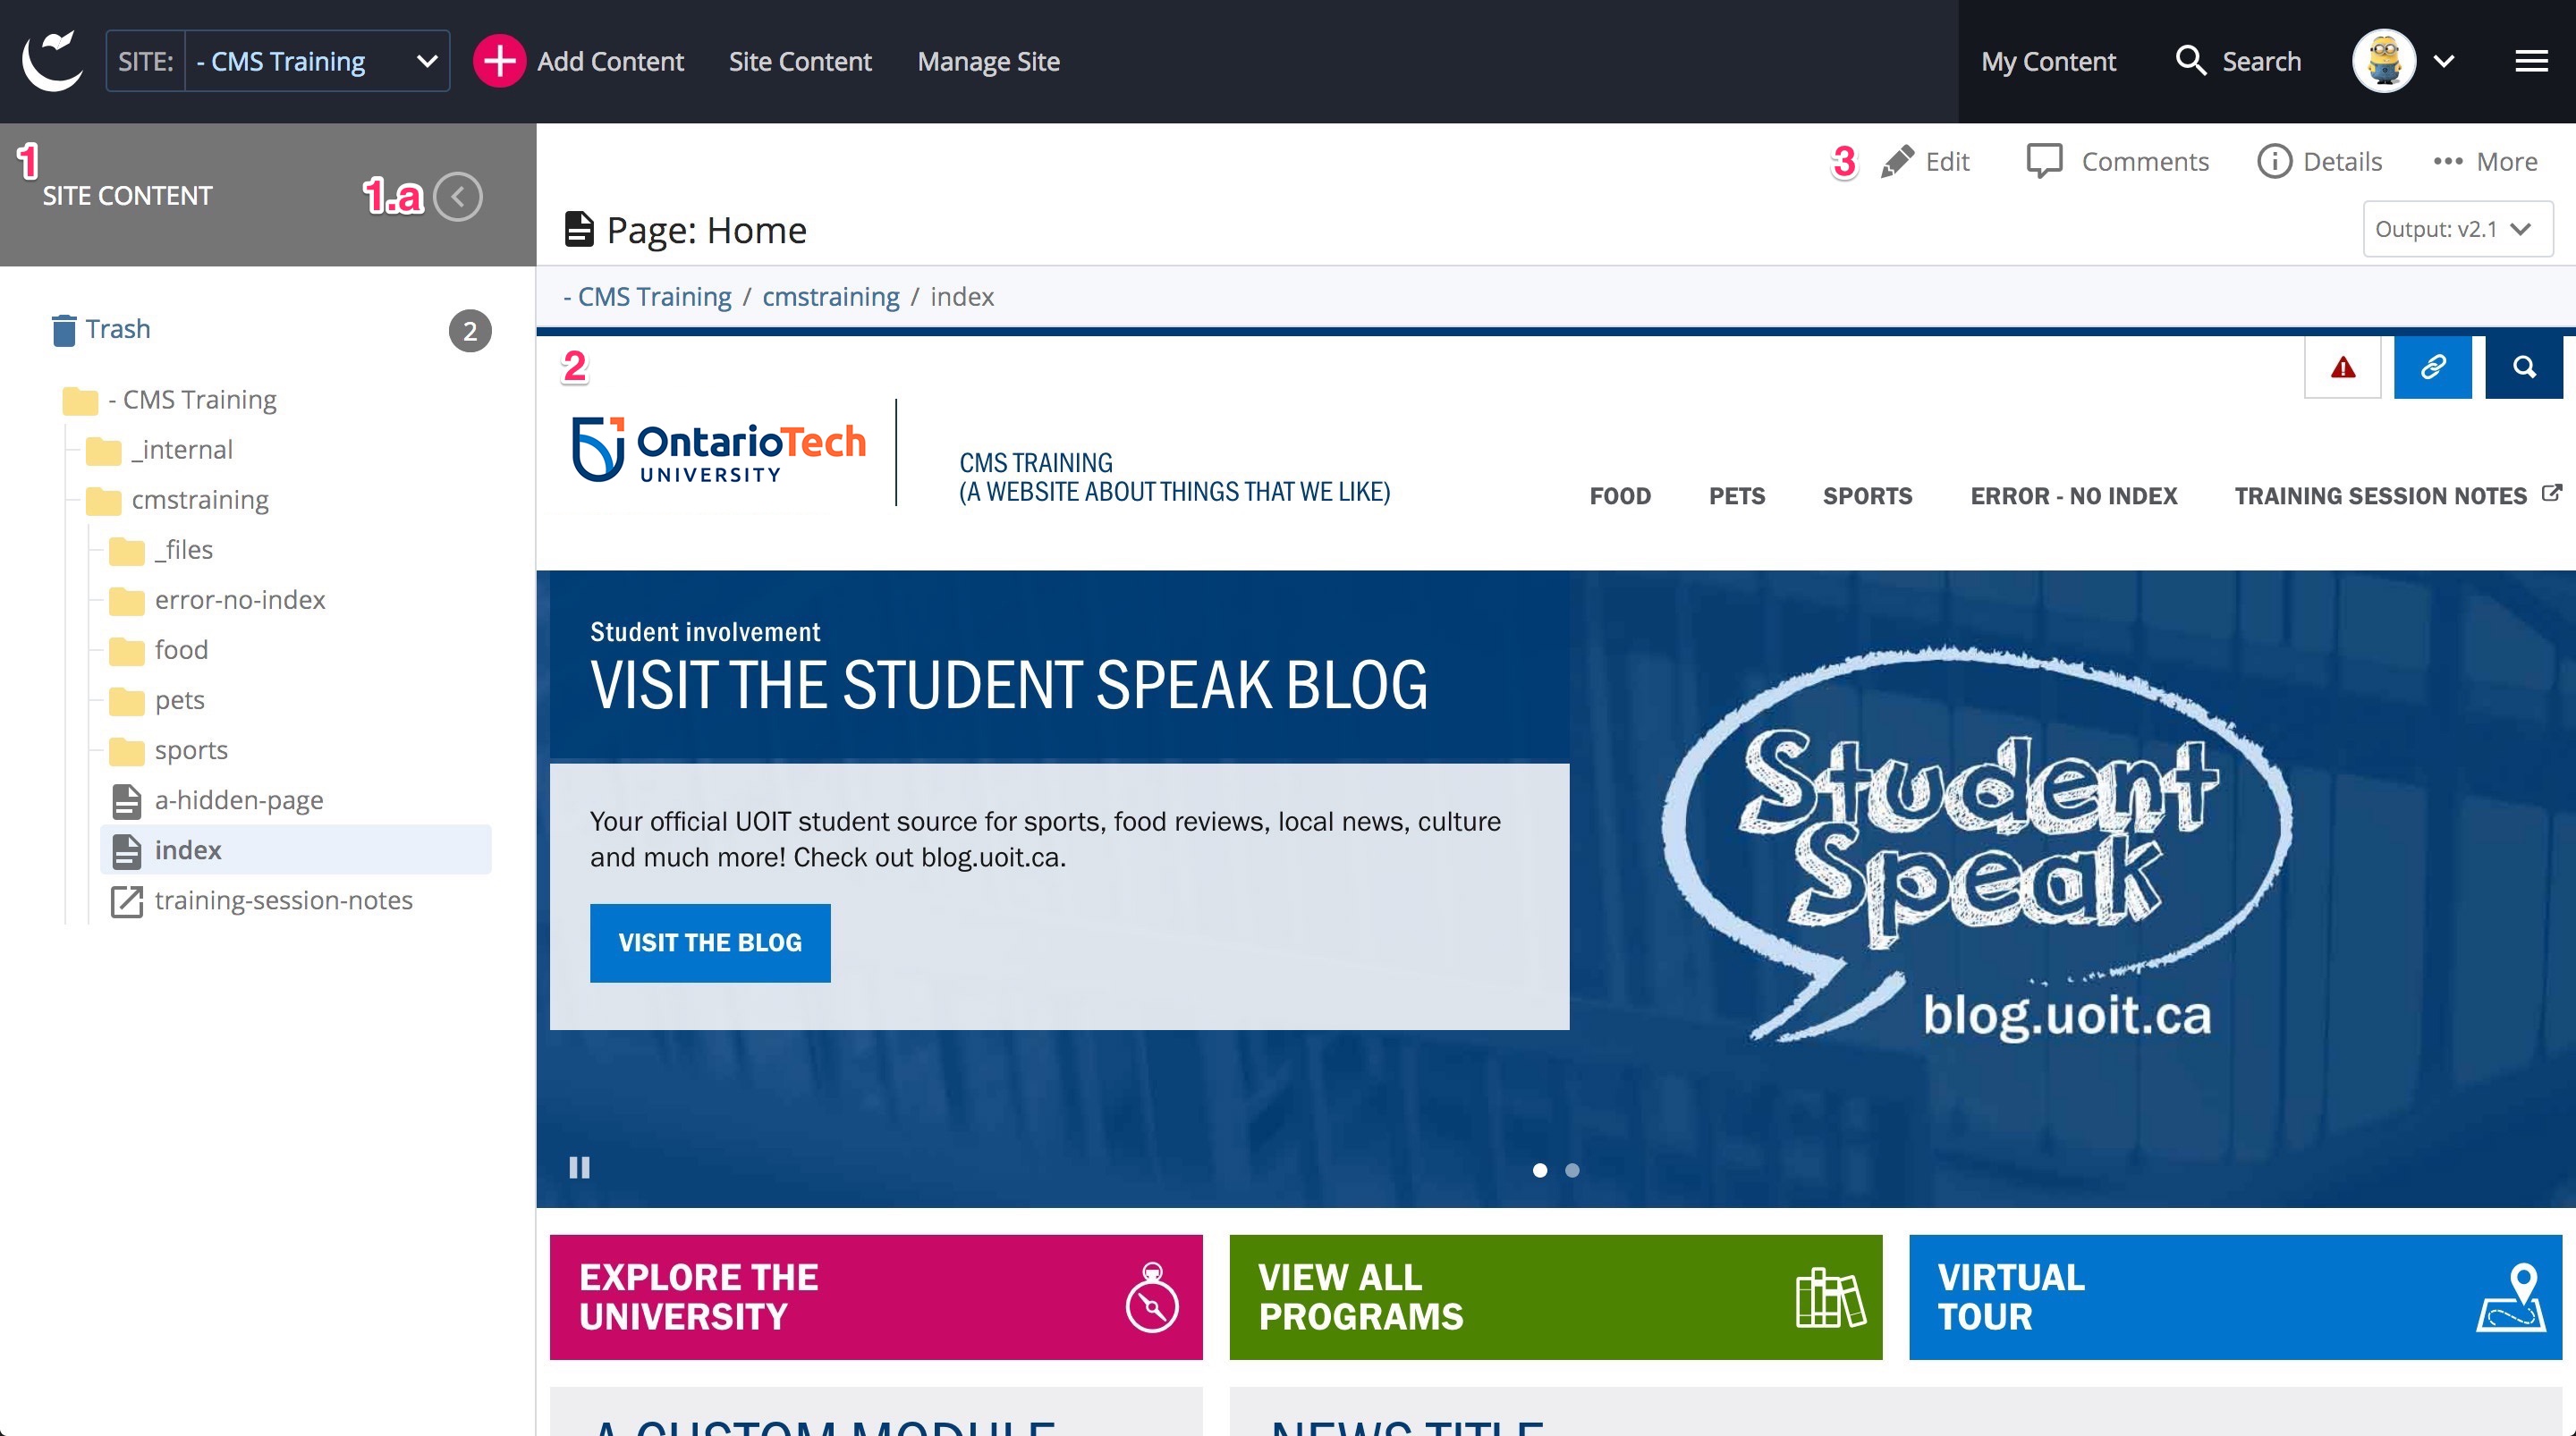
- Site Content menu - a list of folders and pages that make up your site content. The folder structure represents your sitemap or website structure.
- Toggle the arrow to collapse the Site Content menu.
- Content preview area - if a page is selected in the Site Content menu, a preview of the page as it would appear once published will be shown here.
- If a folder is selected, a list of the folder's contents will be shown.
- If a folder is selected, a list of the folder's contents will be shown.
- Asset editing toolbar - editing options or information about a particular asset. These menu options will change depending on the type of asset you are viewing (e.g. page, file or folder).